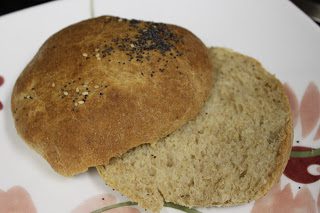
Google + Bread Machine = Burger Buns!
These are only half whole-grain, so I intend to tinker with the recipe to get it all whole grain. I just didn’t want to take a chance of a recipe disaster with no back-up tonight. I’ll update the recipe after I get it worked out…
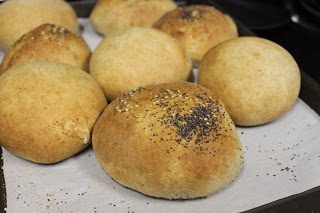
These are soft and yeasty, but still dense enough to hold a burger patty – seriously the best burger buns I’ve ever eaten!
Ingredients
- 1 cup water
- 2 eggs
- 1 1/2 cups whole-wheat flour
- 1 1/2 cups bread flour
- 3/4 teaspoon salt
- 1/4 cup coconut oil
- 1/4 cup raw sugar
- 1 tablespoon bread machine yeast
- 1 tablespoon vital wheat gluten
Directions
1. Place the ingredients in the bread machine pan in the order listed.
2. Put the bread machine in “dough” mode and press start.
3. When the cycle is over, turn the dough out on a floured surface. Shape the dough into a log.
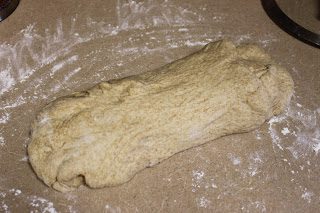
4. Use a sharp knife to divide into eight equal pieces (half, half again, half again).
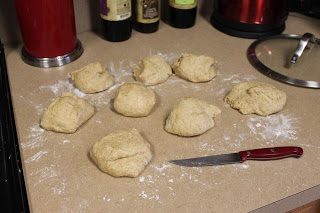
5. Roll into balls (ball-ish pieces are ok) and place on a cookie sheet lined with parchment paper. I only put 4 balls per sheet to make room for them to rise.
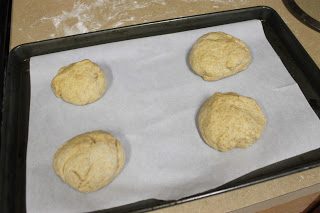
6. Place the dough in a 170 degree oven for 10 minutes. They should about double in size.
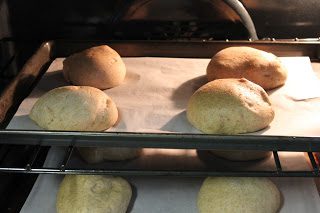
7. Brush the tops of the dough with olive oil and sprinkle with sesame seeds, poppy seeds and garlic powder. This step is optional.
8. Bake at 400 degrees for 10 minutes, or until golden brown.
9. Let the buns cool for at least 5 minutes before you cut them.
You can freeze these for several weeks or store at room temperature in a zipper bag for a few days.