I was sooo excited when I first made these waffles! I was sure I had finally cracked the code for making perfect gluten free waffles and was ready to shout at the top of my lungs…I DID IT! But a quick little Google search for “gluten free overnight yeast waffles” made me realize I wasn’t the first to convert the recipe. In fact, maybe I’m the only one who had never tried waffles made with yeast?
Oh well, I’m not going to let that dampen my enthusiasm. They really are the best gluten free waffles ever and you know what else? This is my 200th post! So that’s exciting right? A milestone of sorts. So what if I didn’t reinvent the wheel here…I can still be proud of myself for making it to 200 ![]() In fact, I feel like whipping up a batch of these waffles to celebrate. Oh no, I just remembered I’m trying to avoid grains these days. I might have to seek Mr Google’s help with converting this recipe to grain free…who knows, I might even create a Paleo version.
In fact, I feel like whipping up a batch of these waffles to celebrate. Oh no, I just remembered I’m trying to avoid grains these days. I might have to seek Mr Google’s help with converting this recipe to grain free…who knows, I might even create a Paleo version.
Now, before I go all Paleo on you, let me tell you about this recipe… A little package of yeast is the key ingredient here. You mix up the yeasted batter the night before, cover it and let it sit in the fridge while you sleep. When you get up in the morning, the batter will look a bit like this…
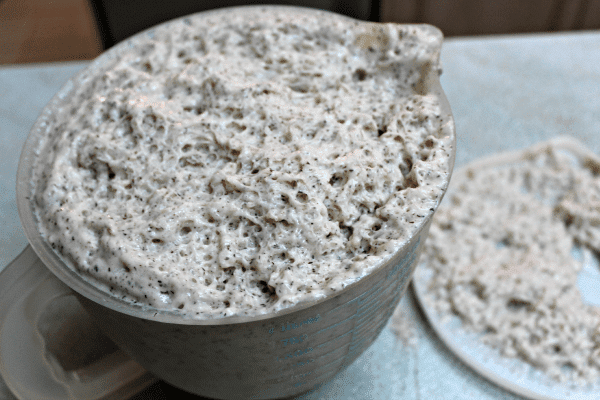
Things were looking a little tight in my old Tupperware container. Good thing it had a lid on it, or I might have ended up with waffle batter all over my fridge. Hey, do they even make Tupperware anymore? Haven’t thought about that for some time. So I have some old Tupperware that I still use and then there’s my old Waffle Iron. See that knife propping up the lid on my Waffle Iron? You know what I call that?
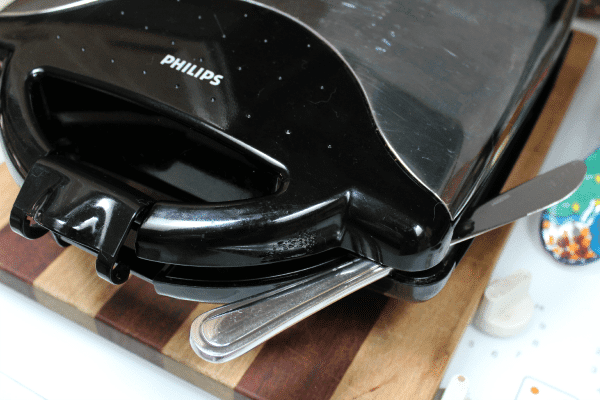
“A good argument for a new Waffle Iron” that’s what!
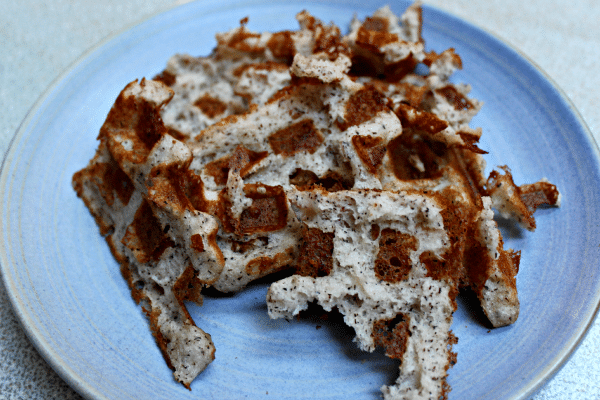
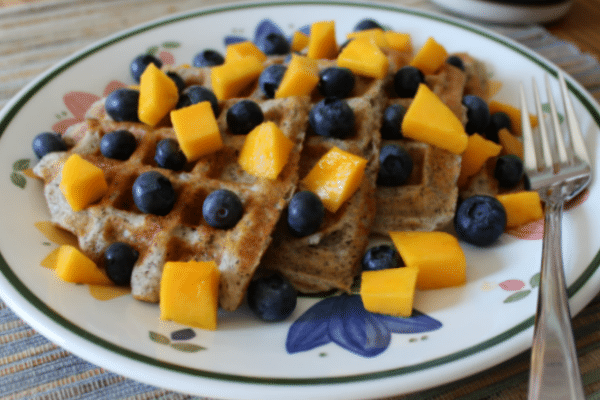
This is what the first waffle looked like. I guess my good old waffle iron has a broken hinge, or is missing a spring or something. The batter was getting spread too thin and without the gluten, these babies don’t have the same support structure as waffles made with wheat flour. Hence the knife to prop the lid. I’m sure your kitchen is much more modern and better equipped than mine. Anyways, the next time you get a hankering for waffles, you really must give this recipe a try. They really truly are the best!
Overnight Waffles {Gluten Free}
Prep Time: 10 minutes
Cook Time: 6 minutes

Gluten Free | Refined Sugar Free | Vegetarian
Ingredients
- Always refer to packaging labels for the most up to date allergy information
- 2 1/4 cups gluten free all-purpose flour mix (**or make your own mix, see below)
- 1/2 tsp xanthan gum, omit if included as an ingredient in your flour mix
- 1 package active dry yeast
- 1/2 tsp salt
- 1/4 tsp baking soda
- 2 Cups almond milk, or milk substitute of choice
- 1/2 cup of butter, or butter substitute (melted)
- 2 extra-large eggs
- 2 tsp honey
- Oil for waffle iron (I used coconut oil)
Instructions
-
- In a small bowl, whisk together flour, xanthan gum (if using), yeast, salt and baking soda. Set aside.
- In a large bowl, larger than you think you’ll need because the batter rises quite a bit, lightly beat eggs. Stir in almond milk, honey and melted butter.
- Add about 1/3 of dry ingredients at a time to wet ingredients, mixing well after each addition. You can use an electric mixer if you like. I used my vintage stainless steel egg beater.
- Cover batter with plastic wrap and refrigerate overnight.
- With a large spoon, scoop about 1/2-2/3 Cup batter and drop on to a preheated, lightly greased waffle iron. Close lid, do not open until done. Waffle Makers can vary greatly. Bake waffles for 5-7 minutes, or as suggested by manufacturers directions. When done, unplug Waffle Iron, allow to cool slightly (about 1 minute) before lifting lid. This helps to prevent the delicate gluten free waffle from falling apart. Remove waffles and keep warm until ready to serve. Plug waffle iron back in and repeat with remaining batter.
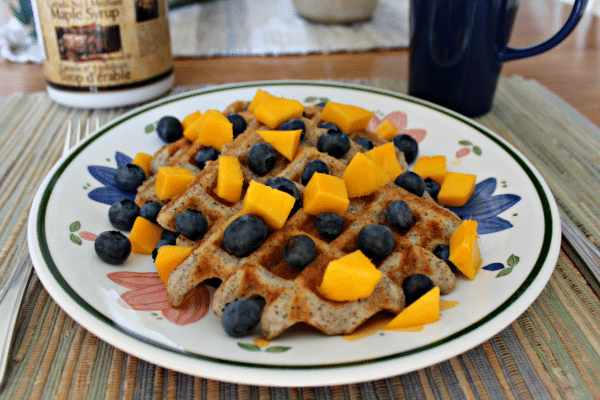
- Serve warm, topped with Pure Maple Syrup and fresh fruit, if desired.
Variations: Please keep in mind that making substitutions will change the final outcome.
- To make an all-purpose gluten free flour mix for this recipe, use ~ 2/3 Cup brown rice flour, 2/3 Cup buckwheat flour, 2/3 Cup tapioca starch/flour, 2 Tbsp millet flour, 2 Tbsp potato starch (not potato flour).
Notes
The batter will keep in the fridge for several days.
Freeze extra waffles and reheat in a toaster oven.