A few months ago when I was in New York, I was watching Cooking Channel in the apartment Ben and I stay in. I was just flipping through the channels and came across Lorraine Pascale make the most beautiful tomato tatin, ever. I sat indian style in front of the TV for the full 30-minute segment, pretty captivated by both, her accent and her food. I love ending summer with something tomato themed and couldn’t wait to be reunited with my oven and try out my own.
…So I did. I’m a little sorry I didn’t photograph it, but believe me when I tell you, my tatin didn’t come out good. It didn’t even come out ‘okay’. Luckily, I opted for the better-safe-than-sorry extra batch heirloom tomatoes, so I boldly powered through, metaphorically and physically dusted myself off and tried again. Here’s what did work.
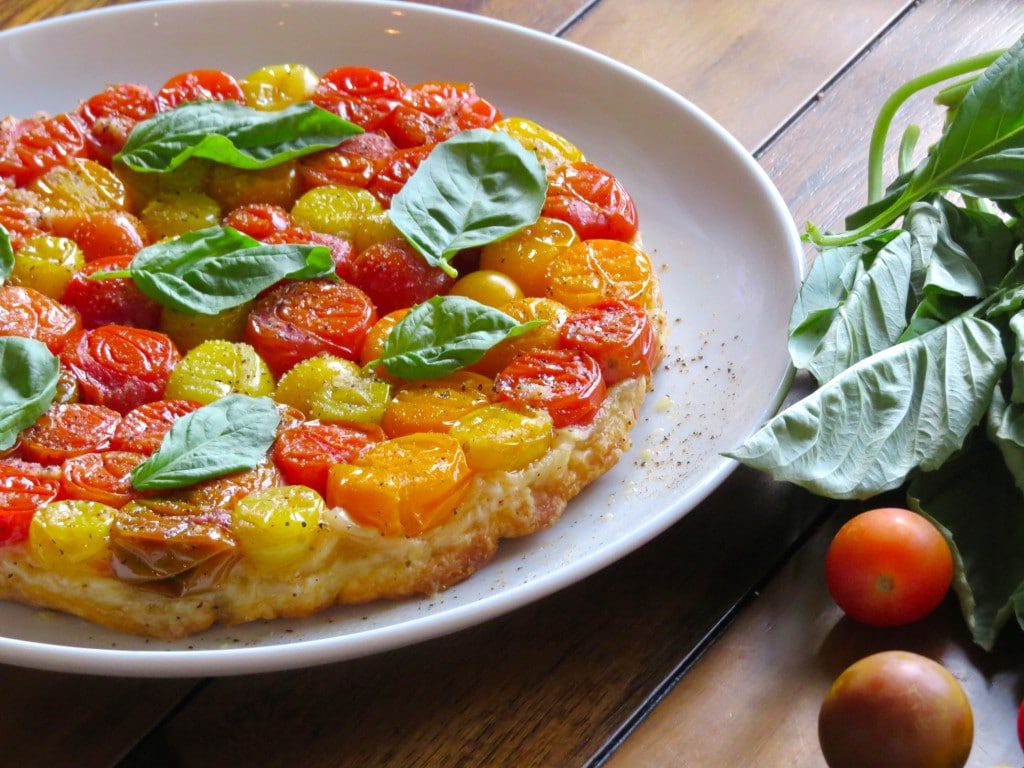
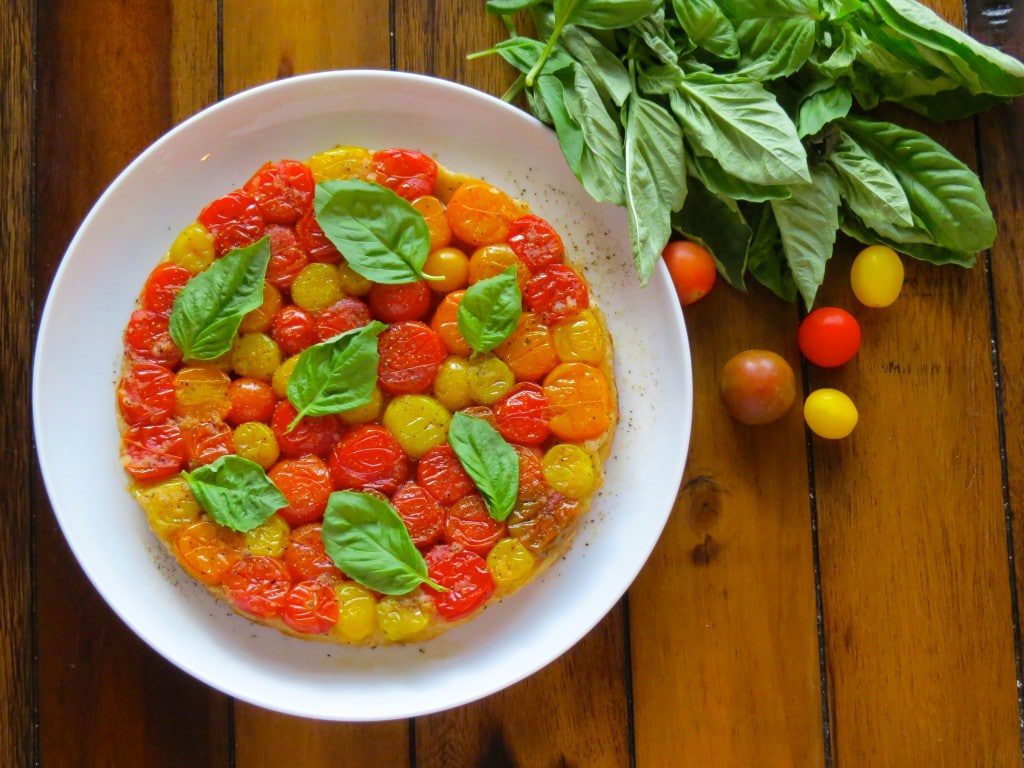
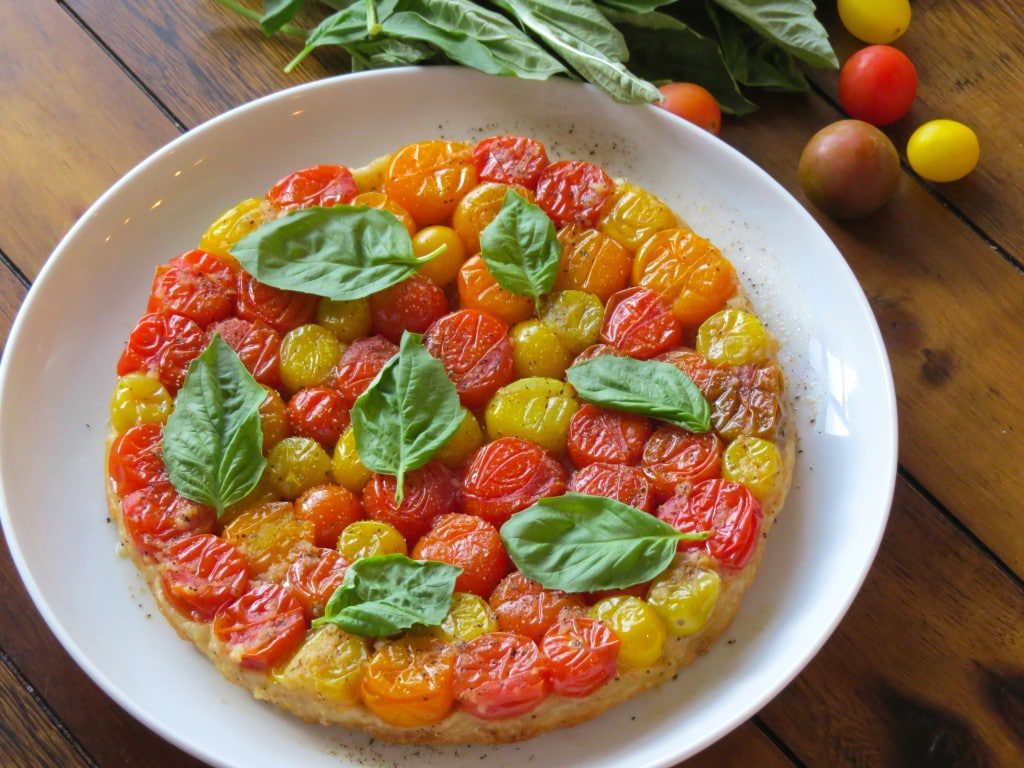
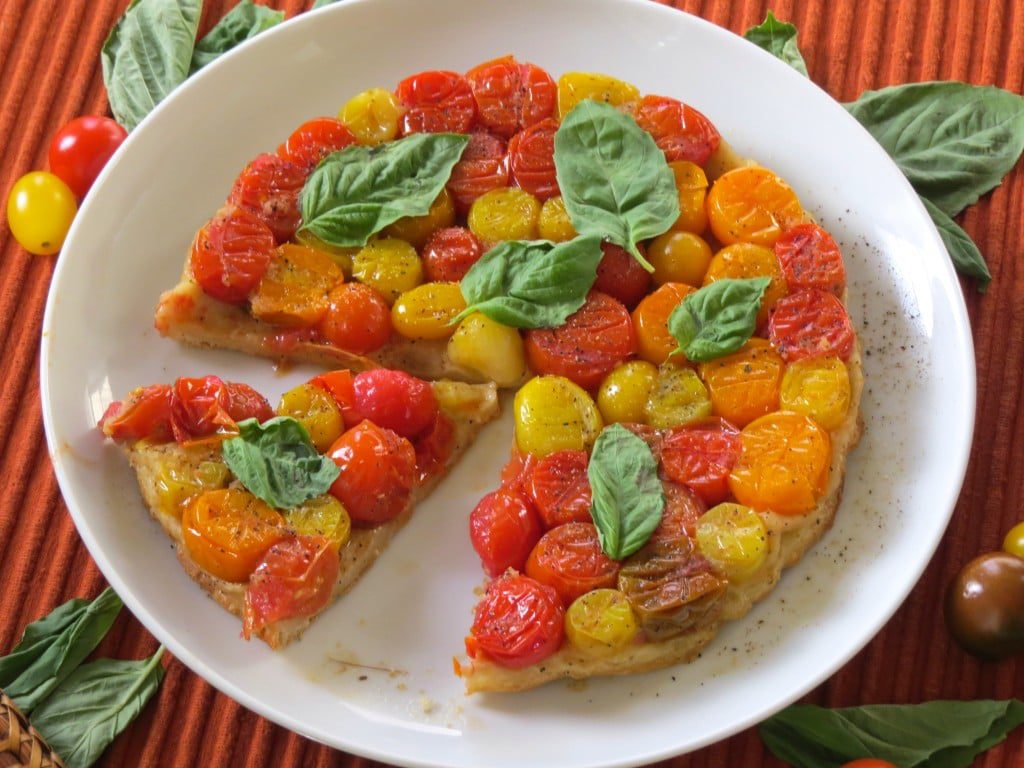
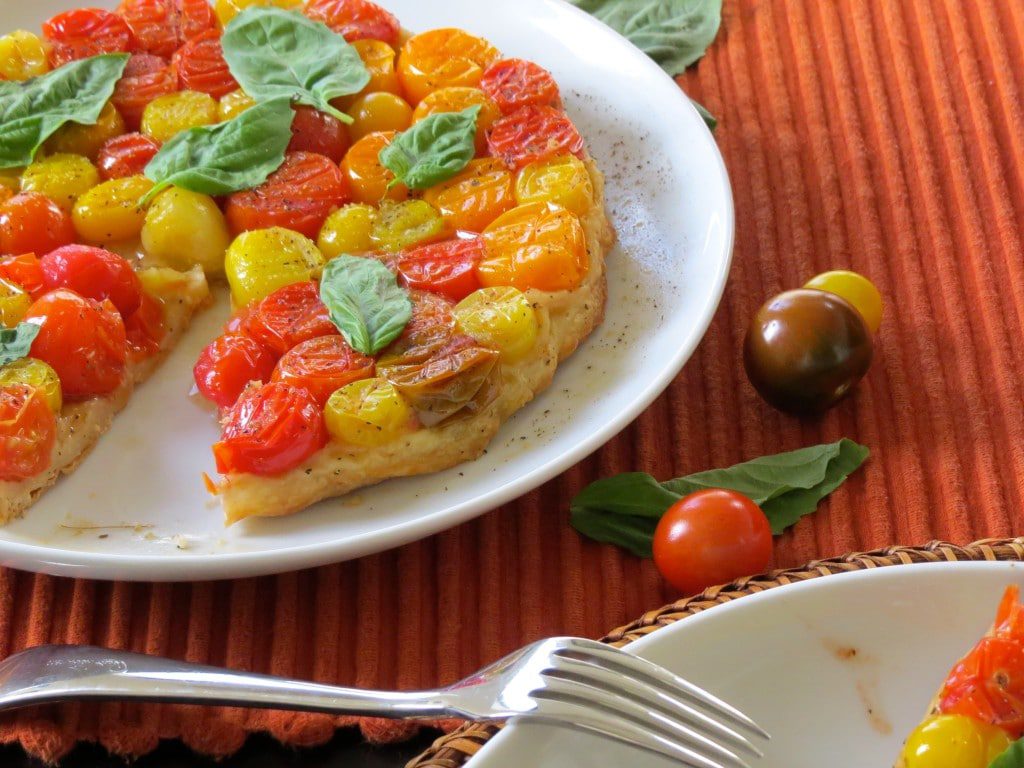
Recipe: Tomato Tarte Tatin
serves 4-6
You’ll need:
1 sheet off puff pastry, dethawed, and cut into a 9-inch circle
1 container of mini heirloom tomatoes
1/4 cup of sugar
1/4 cup of breadcrumbs
salt and pepper, to taste
basil, for garnish
1. Preheat your oven to 425 degrees.
2. Using a 9-inch oven proof skillet, mix the sugar (use a little less/more depending on how sweet your tomatoes are) and 2 tablespoons of water. Cook on medium heat until the sugar mixture turns golden.
3. Add in the tomatoes, and cook for 1-2 minutes. Place them tightly in the pan.
4. Sprinkle salt, pepper, and breadcrumbs over the tomatoes. The breadcrumbs will help absorb the water from the tomatoes and make sure they stay nice and tight when you flip over the tatin.
5. Place the puff pastry over the tomatoes, and tuck in the edges around the pan. Bake until golden brown, about 30 minutes.
6. Let the tatin cool completely before serving, at least 30 minutes. It’s delicious room temperature, and the more patient you can be, the more you are guaranteed your tatin will hold together. Once it’s been long enough, drain the remaining water out of the pan, and gently flip onto a plate. Add some basil leaves for garnish, and serve. (Next time… I’ll add a balsamic glaze…)


![Warm Coconut "Porridge" [Gluten/Grain Free]](https://www.cookinggoals.com/wp-content/uploads/2020/01/photo123-300x300.jpg)