I don’t come from a baking family. So not only had I never made challah before I got married, I had also never watched anyone else make challah.
There would have to be a learning curve. And I was prepared to learn.
In the first 15 months of our marriage, we sampled about that many challah recipes. I tried (you ready for this?) water challahs and egg challahs, I used whole eggs, just yolks, and just whites. I made doughs that were 100% whole wheat, two-thirds whole wheat, and a scant 25% whole wheat. I baked challahs that called for white sugar, dark brown sugar, light brown sugar, honey, and applesauce. I added vanilla extract, cinnamon, chocolate chips, maple syrup, and craisins (no, not all at the same time). I made recipes with hot water, warm water, and water from the faucet. I braided before and after letting the dough rise. I let the dough rise once, twice, and even three times, sometimes on the counter, sometimes in the oven, and sometimes directly under our heating unit.
There were lots of nice challahs along the way. But somehow, there was always something missing. Either it tasted great but the dough was a nightmare to work with, or the dough came together beautifully, but the taste was only so-so.
I should mention that for about the first year, our challahs were a joint effort. I only dealt with the actual dough –- once it had risen, my husband took over.
Happily, he proved himself quite adept at challah braids with three, four, five, and six strands. As a newlywed, I was often overwhelmed just by making Shabbos for the two of us, so I was grateful to him for taking on that portion of the project.
Eventually, all the trial and error, all the experimenting, and all the advice-seeking yielded my ultimate challah.
This recipe is based on the one my cousin Aviva uses, and it fits my criteria about as well as I could hope. When she gave me her recipe, she warned that it never comes out exactly the same way –- and it’s true.
It might be the weather, it might be the brands you’re using, it might even be your mood at the time. All I can tell you is that it’s delicious, even if not completely predictable.
This period right after Pesach is perfect for filling your freezer with a new batch of homemade challahs. Double or triple the recipe, and you’ll be all set for weeks at a time. For me, the ideal Shabbos meal always begins with homemade challah.
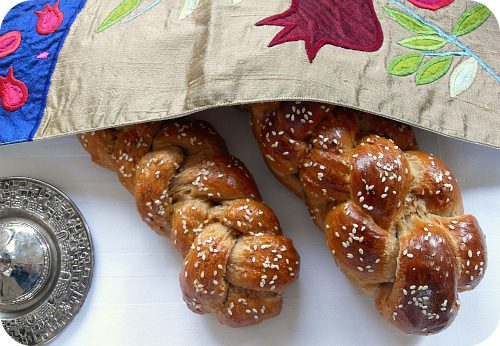
Watch your guests’ eyes as the challah cover is lifted, and you’ll see that eagerness, the happy anticipation of a delicious meal to come. (I see it every time. Love it.)
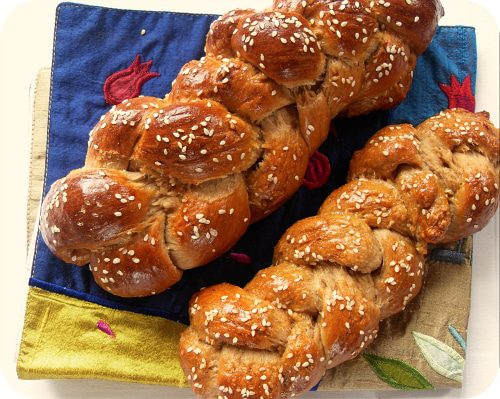
Because when a Shabbos seuda starts with a golden homemade challah, you just know that everything else will fall into place.
Note: You might have seen me talking here about finding the perfect challah. That one was good, too — but I like this one even more.
My ultimate challah
Yield: 4 medium challahs
Ingredients:
- 1 Tbsp salt
- 3½ cups white flour
- 3½ cups whole wheat flour
- ¾ cup sugar
- 1 Tbsp active dry yeast
- 1½ cups room-temperature water, or more as needed
- 1/3-½ cup canola oil
- 1 egg, beaten
- Sesame seeds, to sprinkle on top
Directions
1. Combine salt, flours, sugar, and yeast in a large mixing bowl. Add water and knead until a dough begins to form. Depending on the temperature and humidity, you may need more water. Add just a bit at a time so the dough doesn’t become too wet.
2. Use the oil to coat your hands, then pour about half around the edges of the bowl. Work it into the dough, then pour the remaining oil around the edges and work that into the dough, too. Knead for another couple of minutes.
3. Cover the bowl with plastic wrap and a clean kitchen towel. Let it rise in a warm place for 2-3 hours. (If it’s cold inside, you can leave the bowl in a warm oven – around 150 F/65 C.)
4. Knead again briefly, then spray your work surface with oil. Divide the dough in four and form six dough ropes (for a six-strand challah) from each fourth. Braid.
5. Preheat oven to 350 F/180 C.
6. Place braided challahs on parchment paper-lined baking sheets and cover with kitchen towels. Let rise 20 minutes.
7. Brush with beaten egg, sprinkle with sesame seeds, and bake 30-35 minutes or until golden brown.

