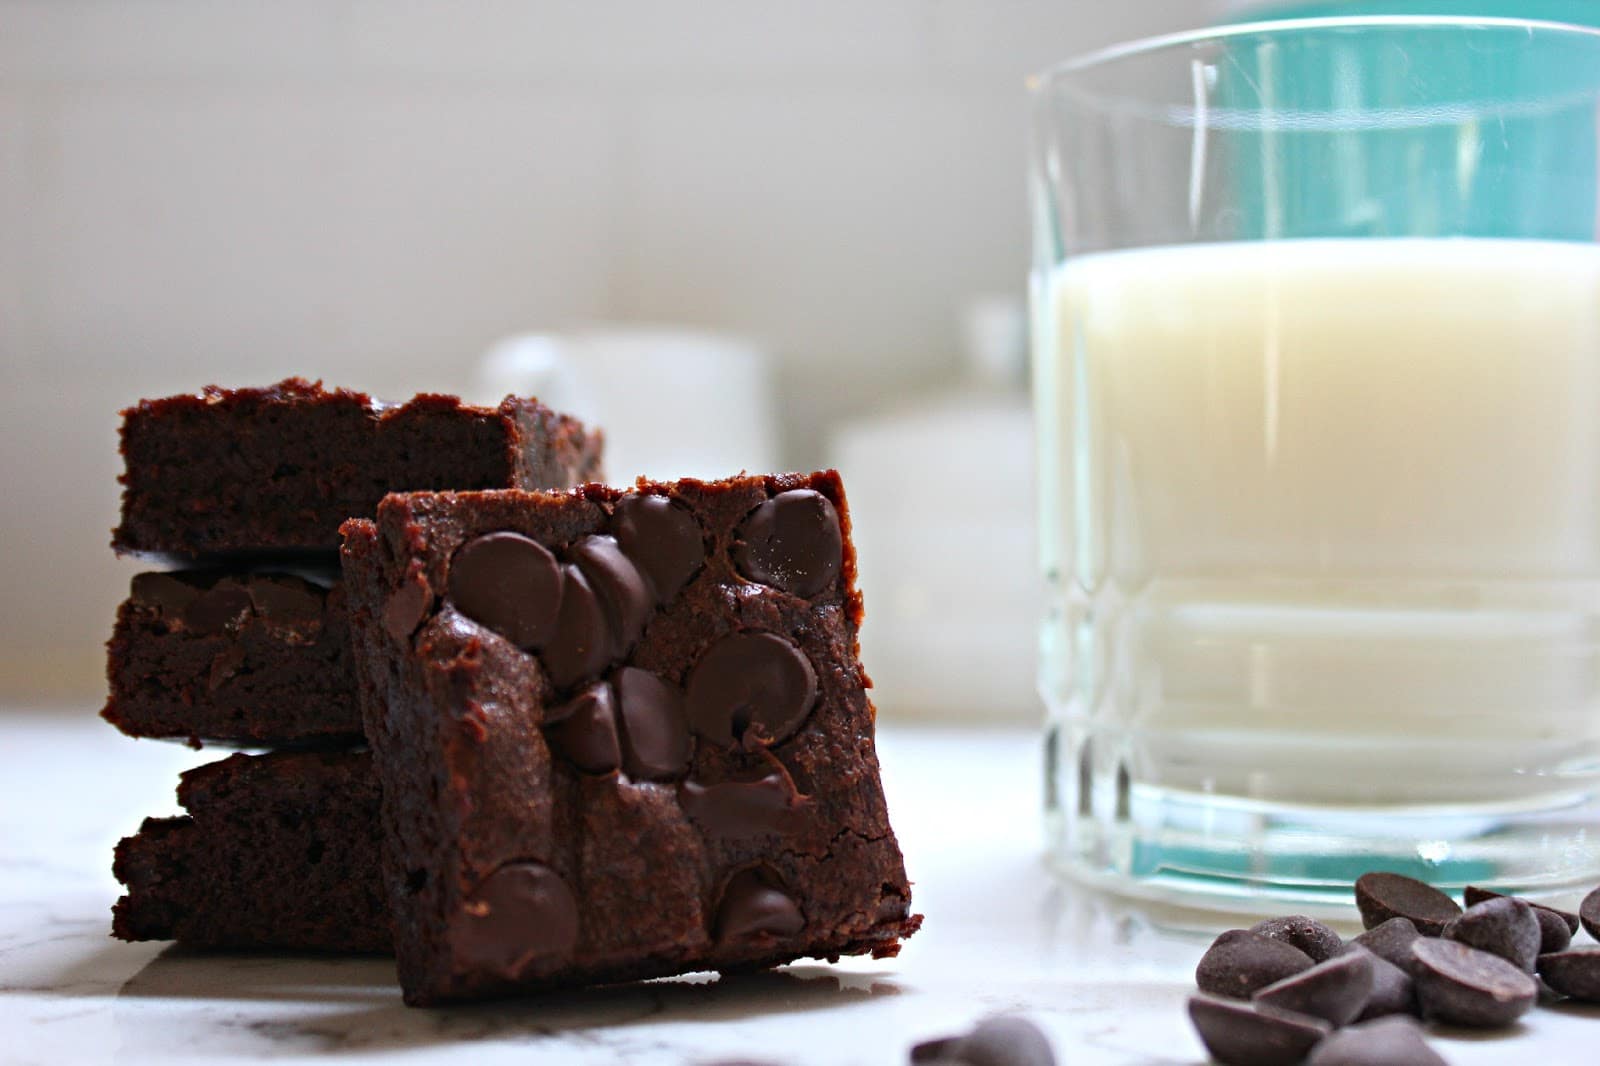
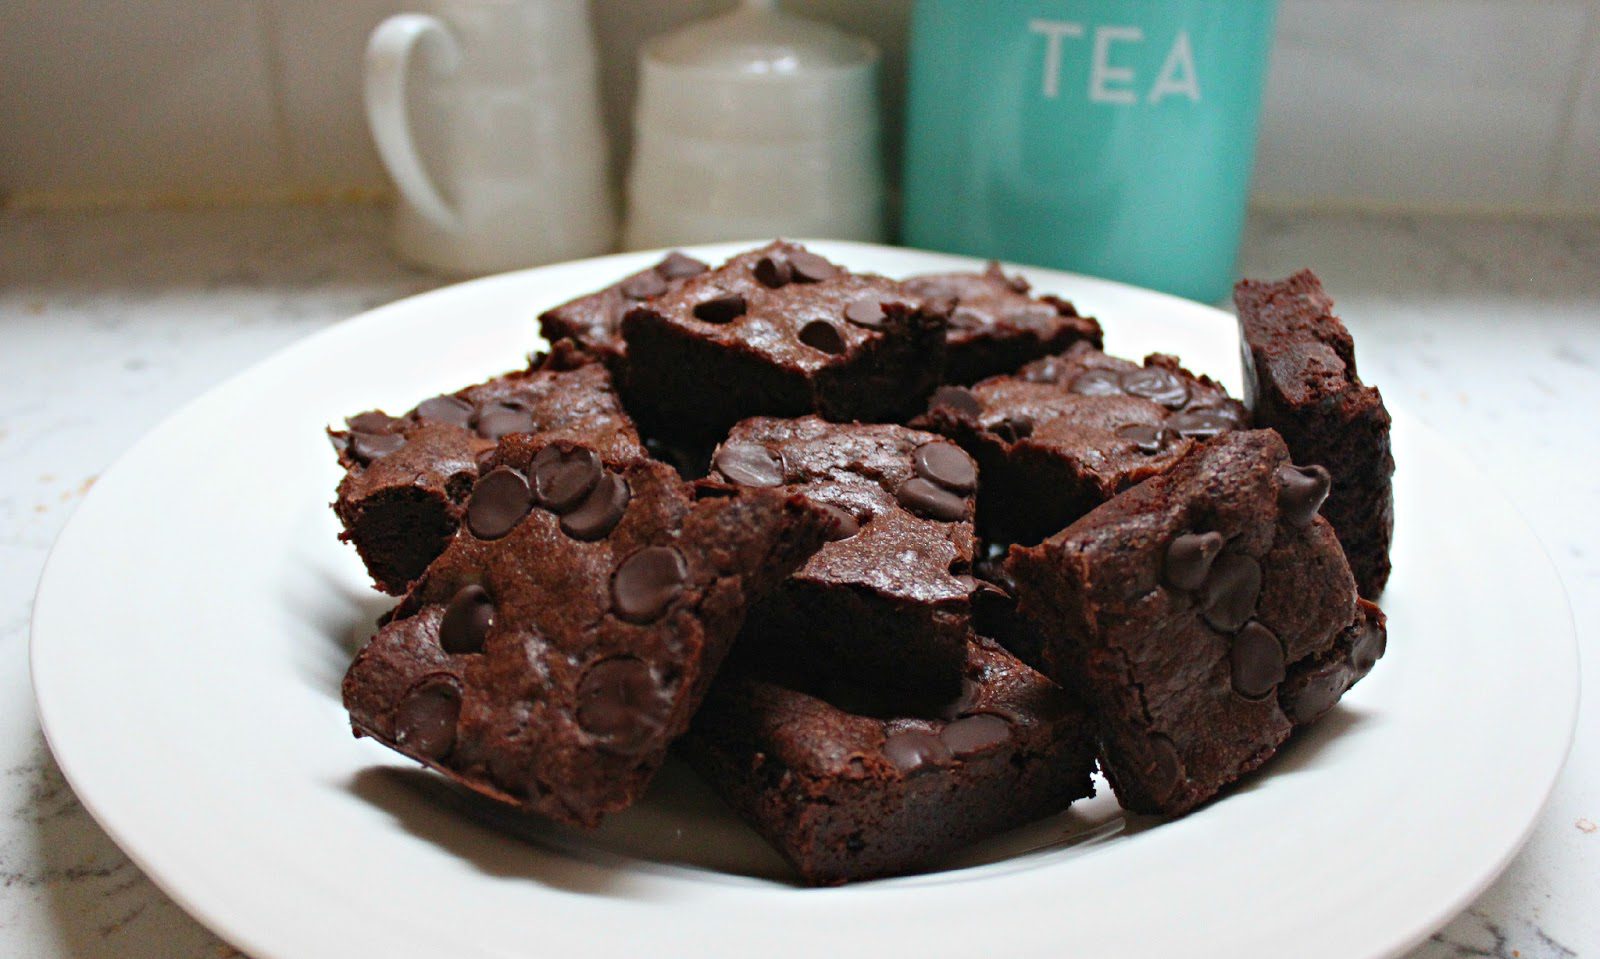
Most brownie recipes call for two things that these ones don’t: leavener (either baking soda or baking powder) and melted chocolate. Without anything other than eggs to make these rise, they’re much closer to fudge than to cake. Instead of the cocoa butter found in a bar of chocolate, there’s just cocoa and butter. Because there’s no leavener, you don’t have to worry about what kind of cocoa—dutched or natural—you’re using and how it will react. Just use whatever you find most delicious; but know that I’ve made these with Fry’s, which is the most commonly available generic cocoa here in Canada, and they were sublime. I’ve also doctored them with a little instant espresso powder–I’m sure you already know the trick of adding something coffee-ish to recipes with chocolate in order to bump up the intensity of the chocolate flavour, and it really works here.*
As for butter, the better the butter, the better the brownies. If I’m feeling luxuriant (and flush, since the stuff’s expensive) I’ll use Stirling 84%, which is the highest-fat Canadian butter on the market (Plugra would be the nearest American equivalent); otherwise, I just use a good-quality supermarket butter like the cultured butters from Lactancia. As a confirmed chocoholic, any chocolate that comes into the house is generally earmarked for eating, and so it’s not often I’ve got a few spare ounces around for melting into baked goods. But I’ve always got cocoa, and I’ve always got butter. It’s a short stop—a little melting and stirring—from there to brownies.
Aside from how good these taste—dangerously good, in case you were worried—there’s one more thing that I love about these beauties: an almost total lack of cleanup. They’re made all in one pot—no bowls!—and if you weigh your ingredients, you don’t have to dirty measuring cups either. Just tare your scale with the pot on it, and then re-tare it after every addition–your measurements will be perfect, as will your brownies. And when the batter is smooth and glossy, it gets poured into a pan lined with foil, so you don’t have to clean that either.
They’re perfect, really.
* If you wanted to go in a slightly different direction with these, increase the instant espresso to 2 tablespoons and sprinkle the tops of the brownies with toffee bits, or swirl a few dollops of dulce de leche through the batter with the end of a cake tester. Coffee toffee brownies are very good.
One-Pot Cocoa Brownies
Heavily adapted from Alice Medrich’sBittersweet
Makes one 9” x 13” pan, which cuts into anywhere from 18-36 brownies. Perfect for a crowd.
1 ¼ cups (280 grams) unsalted butter
2 1/2 cups (500 grams) sugar
1 3/4 cups (130 grams) unsweetened cocoa powder (natural or Dutch-process)
A heaping ½ teaspoon of flaky salt
2 teaspoons instant espresso powder (optional)
4 large eggs, cold
1 teaspoon pure vanilla extract
1 cup (130 grams) all-purpose flour
1 cup chopped walnuts or pecans (optional)
½ cup good-quality (I use Callebaut) semi-sweet chocolate chips (optional)
Preheat the oven to 325 degrees. Line a 9”x13” baking pan with foil (my preference) or parchment, leaving enough overhang that you can use the excess to as handles to lift the brownies out of the pan.
In a medium pot, combine the butter, cocoa, and sugar over low heat. Cook, stirring frequently, until the butter is melted, the cocoa and sugar are combined, and the mixture is hot. It might look separated (a grainy mass surrounded by melted butter) or just gritty, but don’t worry. The eggs will bring everything together in the end.
Off the heat, and using a sturdy wooden spoon, stir in the vanilla. Then, quickly stir in each egg, one at a time. The goal is to incorporate each one before it starts cooking with the heat of the batter. The batter will become smooth, glossy, and completely cohesive.
Lastly, add the flour and nuts (if using) and stir until everything is well and completely combined—about 50 strokes. Pour and scrape the batter –I switch to a rubber spatula for this–into the foil-lined pan, making sure to smooth it completely into the corners. Give the pan a few solid taps on the counter to even everything out. Evenly sprinkle the chocolate chips over the top, if using.
Bake for 50-60 minutes, or until a tester inserted into the centre of the pan comes out with just a few moist crumbs clinging to it. The brownies will have begun to pull away from the edge of the pan (they’ll be taking the foil along with them) and their tops will be slightly glossy.
Let cool in the pan until warm but not hot, then remove the brownies and foil and place in the fridge or freezer until completely cool. They’re easiest to cut when cold.
Peel off the foil, and cut into 18 or 36 squares. Return to room temperature before serving. They’re great for dessert with a scoop of cherry ice cream; next time, I think some dried cherries might have to make their way into the batter–a half cup should do it.

![Gourmet Cake Donuts [Gournuts]](https://www.cookinggoals.com/wp-content/uploads/2020/04/sundonuts-300x200.jpg)