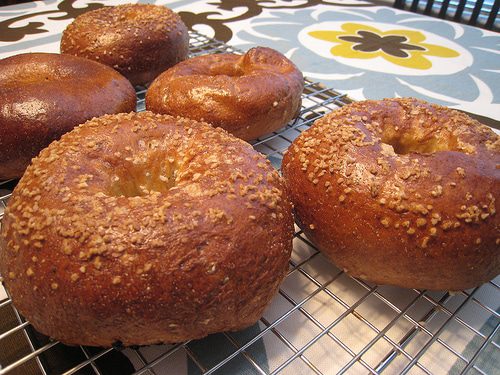
Bagels come with all sorts of toppings available, but the first ones I reach for are usually plain or salt. I dunno why, but those large chunks of salt on the chewy, crusty bread are terrific. Don’t try to make salt bagels yourself unless you have the right kind of salt (look for pretzel salt). I love salt bagels so much that I actually went to a local bagel store to ask if I could buy a cup of their salt. Fortunately, they were friendly enough to give me a small container (and I picked up a couple bagels while I was there). Why spend an entire paragraph talking about salt? Because now you can’t blame me when you use kosher salt and it doesn’t turn out correctly. The difference between bagel salt and other salts is that it doesn’t dissolve as easily. If you tried this with kosher salt, the flakes would stick, but dissolve after a while. And that is no good at all.
All breads have flour, water, and yeast (salt and a few other things are sometimes added). What differentiates breads is not only the quantity and type of each of these, but also the method of combining them. I often take a fairly lengthy approach to bread making, but only because it minimizes active working time. When I made these bagels, it took nearly three days from start to finish, but not much of it was active working time. If you like these steps can be combined and made in a day, but a bit of flavor is sacrificed. Allow the dough a long, slow, overnight rise to help develop more flavor. If you have the patience, try to include all the rests and pauses that I recommend.
Bagels
Recipe adapted from Rose Beranbaum’s Bread Bible. Check out her book here or her site here.
Ingredients
I’ve broken the ingredients and instructions down into separate sections showing at which point different items are needed. If you have a scale, measure everything by weight. I have given the primary measurement as grams, then a volume approximation and the equivalent amount in ounces.
Ingredients: Starter
1/2 tsp instant yeast
265.5 g water (1 cup + 1 tbsps, 9.3 oz)
234 g bread flour (1.5 cups, 8.25 oz)
Ingredients: Dough
21 g unsalted butter (1/5 tbsp) (room temp)
182g bread flour (1 cup +3 tbsps)
1/2 tsp instant yeast
1/2 tsp barley malt syrup (or malt powder) (optional)
1/2 tbsp sugar
salt 1/2 tbsp
Ingredients: Boiling
2 tbsp molasses (or 1/4 cup brown sugar)
2 tsps baking soda
at least 8 cups water
Ingredients: Egg wash (optional)
2 large egg whites
1 tsp cold water
Directions
Refer to the above ingredients for each stage of the instructions.
Starter
In a large bowl (if you have a stand mixer, use that bowl), whisk all the starter ingredients until thick and all the flour is incorporated. Cover bowl with plastic wrap
Dough
Sift all the dry ingredients together (without the butter and malt syrup, if using malt powder, add it now) and sprinkle over the starter to create a cover of flour. Cover the bowl with plastic wrap.
First Rest
Allow to stand 1 to 4 hours. Can be refrigerated overnight after standing at room temp for one hour. If refrigerated, remove from the fridge about one hour before using.
Dough (mixing)
Add the melted butter now (and malt syrup, if using). Mix with dough hook on low speed until combined, increase the speed to medium and knead for 5 to 7 minutes. If the dough doesn’t pull away from the bowl after 5 minutes, add up to 2 tbsps of flour. If you like denser bagels, continue adding about 1 or 2 tbsps more flour. (These bagels are dense anyway, so use a light hand if this is your first batch.)
Second Rest
Place the dough into a lightly oiled, large bowl, cover the bowl with plastic wrap, and allow to rise until doubled, about 1 to 2 hours.
Flatten and stretch the dough out gently, fold into thirds and set it back into the container. Refrigerate at least four hours, or overnight (or even up to 2 or 3 days). Allow dough to come stand at room temp for 30 to 60 minutes before continuing.
Shaping
Cut the dough into 5 equal pieces, cover with plastic wrap so they don’t dry out. Begin by shaping each one into a flat disk, then bring the sides to the top and pinch them together to make a ball with a seam at the top where the dough was brought together. Push that seam through the ball of dough to make a hole. Stretch the hole open to make about a 2.5 inch hole. (Seems big, but it will shrink as the dough rises.) Allow to rise about 15 minutes.
The boil
Meanwhile, preheat the oven to 500F and bring a large pot of water to a boil with the molasses (or sugar) and baking soda.
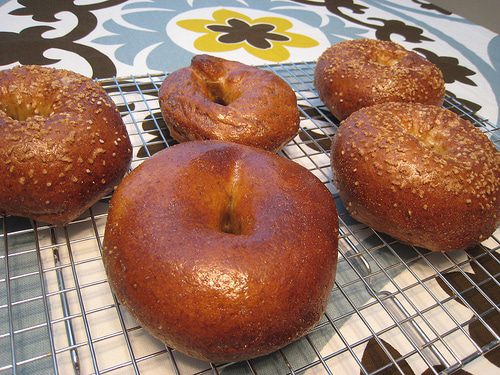
Gently boil a few bagels at a time. Boil each bagel for 30 seconds to 2 minutes. Cooking longer will create a thicker, denser crust (I prefer mine removed from the boil after about 45 seconds). Remove the bagels to a wire cooking rack. Bagels may look wrinkled, but they will smooth out as they bake.
Extras
Brush the bagel with the egg white glaze. The glaze will help the ingredients stick to it, so if using garlic, salt, seeds (poppy, sesame, etc.) or anything else, brush with the egg wash and then sprinkle the topping on it. (The best method is to set the “top” of the boiled bagels down onto a plate of scattered seeds.
Baking
With the oven now at 500F, bake the bagels on a hot stone or baking sheet. After 5 minutes at 500F, lower the heat to 450F and bake for 20 more minutes. Check the color after 15 minutes, if beginning to darken more than you like, toss a sheet of foil on top. When the 20 minutes have elapsed, turn off the oven and cook for 5 more minutes. Transfer them to a wire rack and allow to cool.