Lucky me! I’ve been on a whirlwind cooking tour these past few days. Mostly this means I’ve been cooking a lot and not in my own kitchen. But it also means that I’ve been making new things and from different cultures. Yesterday, I headed to the hills to make salted caramel ice cream and this month’sDaring Bakers’ Challenge (my first!) with my friend who is in from Hong Kong. Today, I ventured away from the sweets and into the world of Indian food.
I’vetalked about my love of Indian food before, but have generally lamented my inability to master any dish that tastes decently authentic. So when I e-mail my long-time friend Sumati (since the sixth grade!) for her mother’s pakora recipe for my Chickpea Flour Extravaganza, and she and her mother offered to teach me a few dishes, I had no choice but to accept. The two most important things I learned today are that it’s silly to be intimidated by Indian cuisine simply because it contains a lot of ingredients, and that it’s all about the spices. In fact, we started my lesson with a spice tutorial.
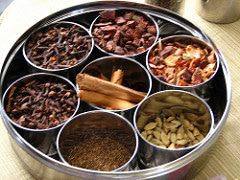
Lesson One: If you’re going to master the art of Indian cuisine, you’re going to need a spice box that provides quick access to your whole spices. To the left we have cloves, star anise, sajeera (caraway), cardamom pods, cinnamon and bay leaves. There’s something else in there, but I seemed to have not written it down.
Lesson Two: Coriander and turmeric are essential. You will almost always use at least one of the two in a dish.
Lesson Three: Certain spices, particularly masalas, should be added during the last five minutes of cooking. Otherwise, the flavor gets lost and loses its pungency. It was suggested that I grind 2 tablespoons coriander seeds, 1/2 a cinnamon stick, 5 cloves and 1/4 teaspoon cardamom seeds and add a tablespoon of the mixture to curries within this time frame.
As for intimidation, with a good recipe and a little palette practice, you don’t need to be masterful in the kitchen to make these dishes at home. In fact, besides the prep, they don’t require much active kitchen time, as there is a lot of simmering involved. We used the down time to discuss a myriad of things, including the fact that, when Sumati’s mother was younger, women in India took cooking classes upon marriage so they could learn to provide for their families. While she learned mostly from her mother, other women in her family definitely needed the kitchen lessons. I also found out that in her family’s village in Southern India, early every morning people come by with the day’s food. One person brings the milk, another the potatoes, and another the tomatoes. Talk about eating fresh and local. And making me want to tag along on their next trip.
All in all, it was a lovely afternoon. Biryani (a rice dish), Chana Masala (chickpea curry), and Raita (dairy-based dipping sauce) were taught and consumed. Plans for a future lesson in pakoras are forthcoming and will hopefully be paired with a little teaching of my own in the art of bread making. And I got to spend some time with a good friend before she starts her intern year at a local hospital. Have a go at the recipes below, they’re delicious! Thanks again Sumati’s Mom!
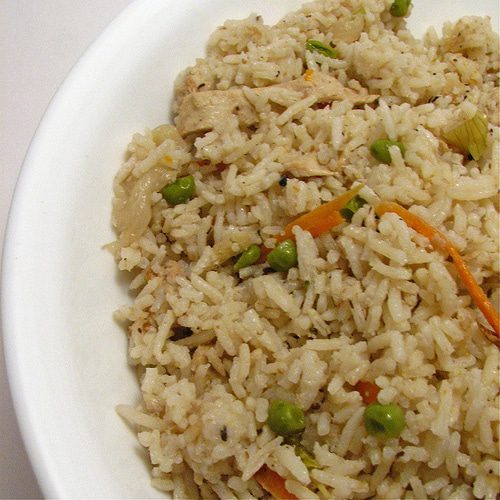
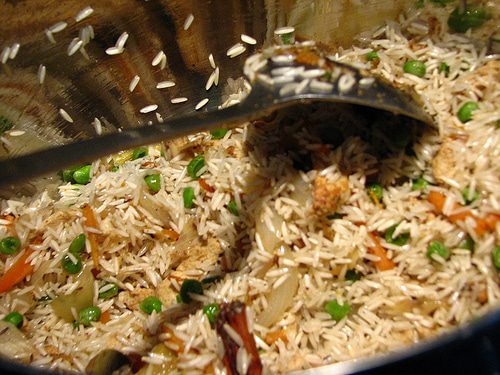
BIRYANI
1 Tbsp. butter
2 Tbsp. canola oil
3 cloves garlic, crushed and chopped, or ground with pestle
1 inch ginger root, peeled, crushed and chopped, or ground with pestle
1 bay leaf
1 cinnamon stick
1 tsp. sajeera (the internet tells me that, in English, these are caraway seeds)
3 cloves
1/2 tsp. cardamom seeds
1 star anise
—————–
1 green chili, finely chopped
1 cup carrots, julienned
1 brown onion, julienned
—————–
1 cup peas
2 1/2 cups basmati rice
1 13.5 oz can coconut milk
4 1/2 cups water
Potatoes, chicken, paneer, slightly pre-cooked (optional)
salt
—————–
1 Tbsp. biryani masala (if unavailable at local Indian market, use a little ground coriander, cinnamon and clove)
For this dish, it is important to have all of your ingredients set out and prepped at the beginning so you don’t forget anything. I have broken the ingredients up into four parts to facilitate this. For the first part, I suggest mixing all of the spices, ginger and garlic in a little bowl. For the second section, mix your chili, onion and carrots into their own bowl. You can use pretty much any vegetables you want, but if they need a little longer to cook, throw them in that first bowl. My friend’s mother suggested that, if you are so inclined, you can add chunks of potatoes, chicken or paneer to the dish. If you choose to do so, you should cook the potatoes and chicken most of the way. With paneer, a quick searing in a pan should prevent it from falling apart.
1. In a large pot, add canola oil and butter until melted. Then add in the first section of spices until the aroma is pungent. This releases the flavor of the different seeds.
2. Add in the chili, carrots and onion, and any other vegetables that require more cooking. Mix in, covering with spices and oil, and let saute until softer and onions are bordering translucent.
3. At this point, add in your peas. Mix in and saute for a few more minutes.

4. If using meat, potatoes or paneer, it’s time to throw those in the pot. My friend’s family is vegetarian, and she enjoys the Morningstar Farm chicken grillers, so those were chopped up and thrown in. You want to add these in before you cook the rice so they finish cooking in all of the flavor.
5. Mix well, so everything is coated by the oil that now houses delicious flavors from the spices.
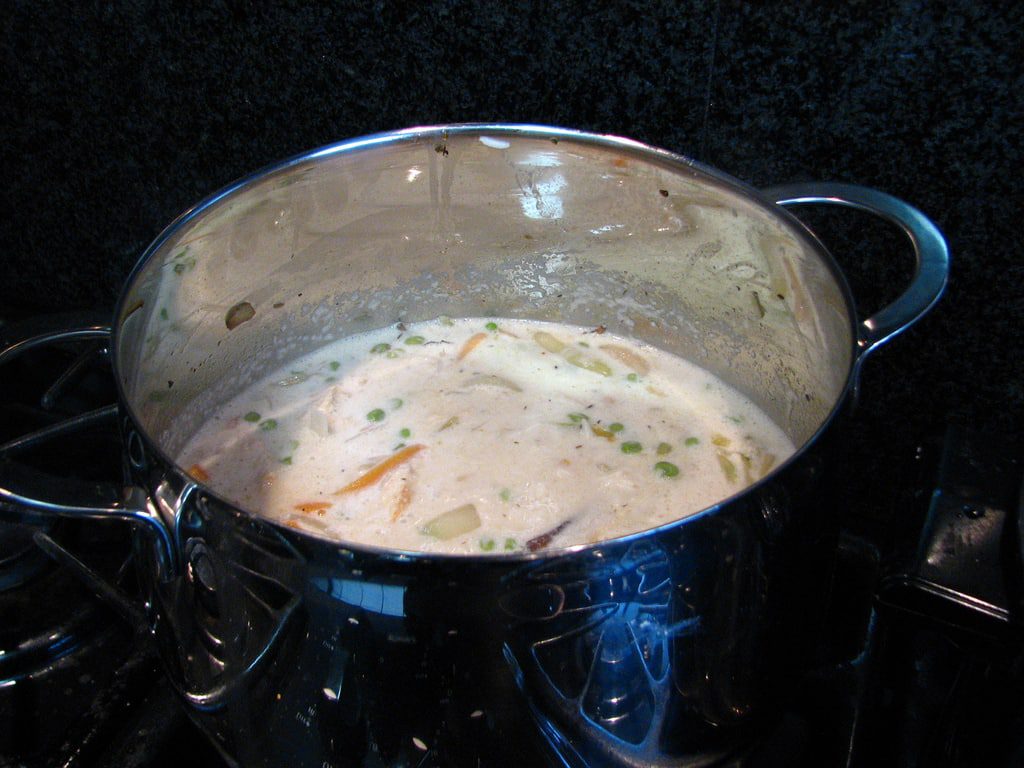
6. Add in rice, coconut milk and water. Salt to taste. Bring to boil, then turn down heat to a simmer, cover and cook until rice is fluffy. The oil and coconut milk should prevent any burning of your pot. I was also instructed that you are to stir from the sides–meaning wedge your spoon down the side of the pot and move around the edge and bottom. Rice cooked in coconut milk will break if you are too harsh in your stirring. You can also do this in a rice cooker because it doesn’t contain any turmeric; but reduce the water so that it adheres to your cooker’s designated water to ingredient ratio.
7. About five minutes before rice is finished, add the biryani masala.
8. The rice should be grainy but not too soft–you don’t want mush. Biryani can also use a “drying out” period after cooking. Place on a large serving tray and let sit for five to ten minutes and you will see that it has firmed up a bit.
CHANA MASALA
1 brown onion, coarsely chopped
1 1/2 Tbsp. coriander powder
2 cloves garlic
2 tsp. cumin seeds
1 14.5 oz can diced tomatoes, including liquid
—————–
1 Tbsp. canola oil
1 tsp. turmeric
1 tsp. chili powder
salt
—————–
2-3 15 oz cans of chickpeas
1 Tbsp chana masala mix (They use the MDH mix as it contains certain ingredients that are difficult to find) or
1 Tbsp garam masala
—————–
cilantro, onion & lemon slices for garnish
1. Bring a small pot of water to boil, place in onion, and cook 3 to 5 minutes until translucent.
2. In a blender, puree onions, coriander powder, garlic, cumin seeds and can of diced tomatoes.
3. In a larger pot, heat up 1 tablespoon of canola oil. Add in the puree.
4. When simmering, add in turmeric, salt and chili powder.
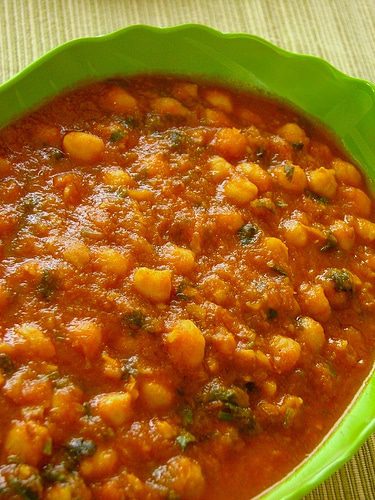
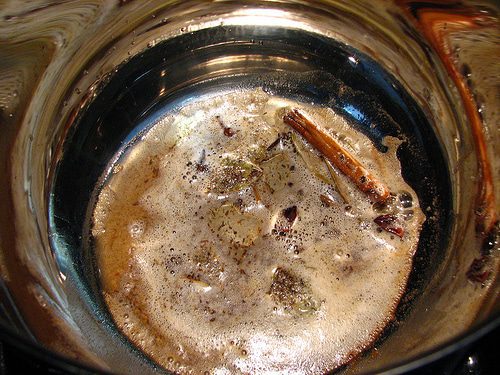
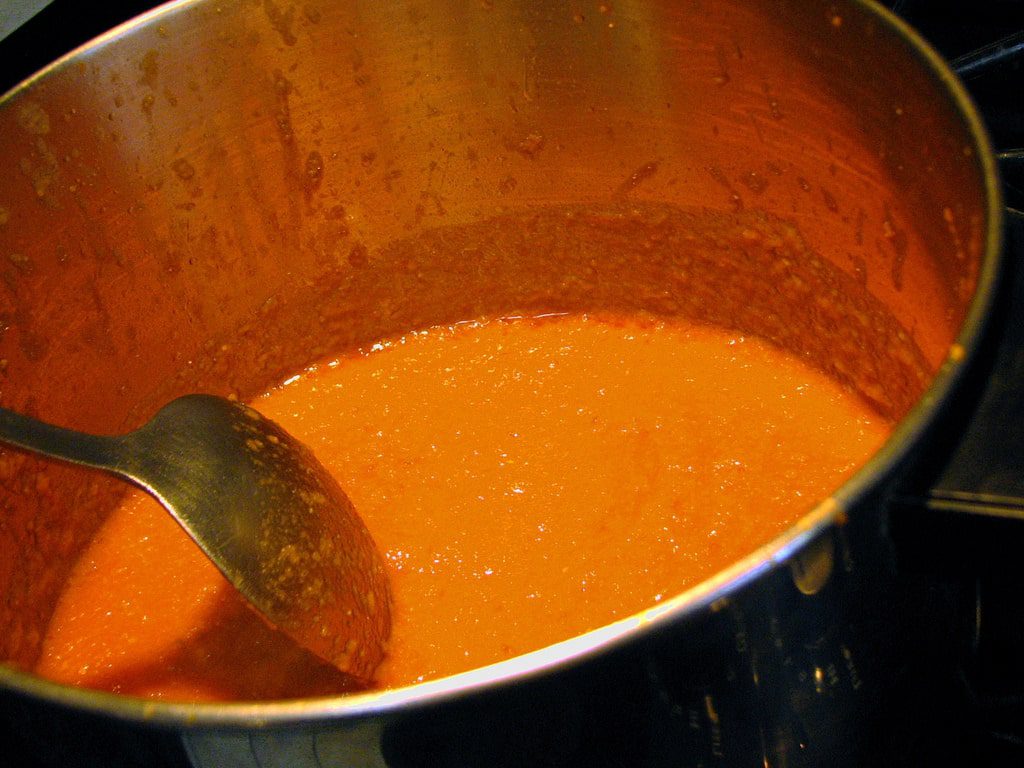 Your sauce will take on this color at this point, so use stainless steel everything. None of my other photos came out. 🙁
5. Drain and wash chickpeas. Take about 1/4 of the total and slightly mash. You want the texture to be coarse and piecemeal. Add all of the chickpeas to pot.
6. Simmer for a while until gravy begins to thicken to desired consistency. Add water if you need to thin.
7. When the oil begins to rise to the top of the liquid, add in the chana mix or masala powder. Allow to simmer for 5 more minutes.
8. Serve with chopped cilantro, chopped pieces of onion and slice of lemon. Oh, and Naan or rice, because that gravy needs to be soaked up by something.
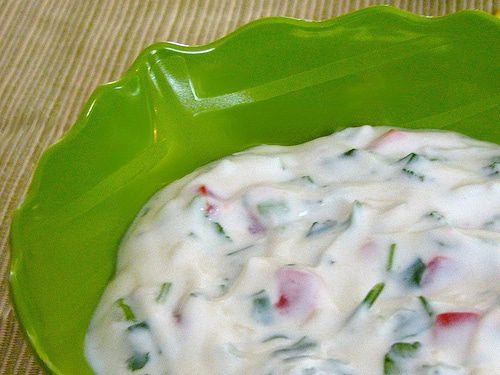
RAITA
8 oz sour cream or greek/plain yogurt
1/4 to 1/2 cup buttermilk
1 tomato, diced (roma is good because they are higher in the flesh to goo ratio)
1/2 brown onion, diced
1/2 bunch cilantro, chopped
1/2 cup cucumber, diced
1/2 green chili, chopped and deseeded
lemon juice
salt
Mix all of the ingredients except for buttermilk, salt and lemon. Add buttermilk until you get a creamier texture. It shouldn’t be too liquid, but should not be as stiff as the original dairy product. Add lemon juice and salt to taste.