I didn’t even grow up eating fried chicken. Yes, I did grow up in the south, but my parents (French and British) never prepared these southern “delicacies” for us. I don’t often get cravings for it and I don’t have a story about having a great recipe from down south that my mom used to make. What I do have though, is Alton Brown.
I’ve looked around for a few ways to make fried chicken at home and tried several variations, but, in all seriousness, I haven’t found a more satisfying version than Alton Brown’s. The man is from Georgia after all, so has to represent the south. His recipe doesn’t call for too many ingredients and is relatively simple to prepare. The most difficult part is cutting a whole chicken into it’s separate parts… and you can already buy them cut. Problem solved.
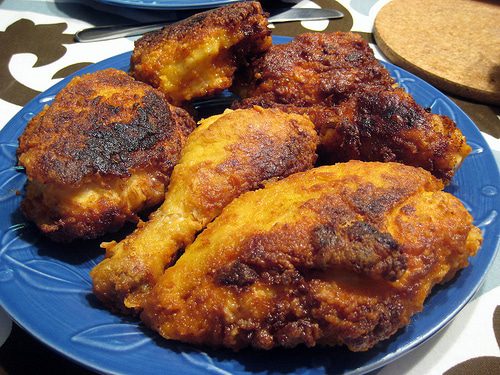
This chicken is amazing served cold too. I’ll sometimes make this for dinner, then find myself fishing in the fridge for another drumstick after a late night out. Fried chicken this good is impressive no matter how it’s served.
I do make one tiny change to his process though. You’ll have to click though to find out what though.
I’ll go ahead and link to his recipe again here. I’ll even point you to his video (watch it, it’s pretty informative). I don’t even mind if you leave this page to use his instructions (but you will miss out on my one addition–no biggie).
Southern Fried Chicken
Recipe adapted from Alton Brown.
Ingredients
1 broiler/fryer chicken, cut into 6 pieces (two breasts, two drumsticks, two thighs, wings can be discarded, or kept and fried after the rest)
at least 2 cups buttermilk
2 tablespoons kosher salt (if using table salt, reduce by about half)
2 tablespoons Hungarian paprika
2 teaspoons garlic powder
1 teaspoon cayenne pepper
Flour, for dredging
Vegetable shortening, for frying
Directions
1. Soak the chicken in buttermilk overnight (refrigerated, obviously). Around 24 hours is ideal.
2. Remove the chicken from the buttermilk and drain in a large colander.
3. Combine salt, paprika, garlic powder, and cayenne pepper. Liberally season the chicken with this mixture. Dredge chicken in flour and shake off excess. Here is where I deviate from Alton Brown a bit. He recommends letting this rest for only 2-3 minutes. I let it rest for 10-15 minutes. I have found that the longer resting time encourages a crisper crust.
4. While the chicken in resting, in a 12-inch cast iron skillet over low heat, melt enough shortening to come about 1/8 inch up the side of the skillet. (Once the chicken is added, it should go about halfway up the sides of the chicken.)
5. When the shortening has liquified, raise the heat to medium to medium-high until it reaches 325 F. Be careful when taking temperature readings, If you rest your thermometer on the bottom of the skillet you’ll be taking the temperature of the skillet, not the shortening. I normally stir the shortening a bit with the probe thermometer to get a better reading. Once at 325F, monitor the heat closely. Bring the shortening almost to 340F and add the chicken. The smoke point of shortening isn’t much higher than 360F, so be careful–don’t let it get above 350F. Err of the side of 325 F if you aren’t comfortable with your temperature readings.
— There is a trick to adding the chicken:
– Place all chicken parts skin-side down.
– Breasts go at the top of the pan, along the outside edge, widest part at the top (pointing towards 12 o’clock with the thinner ends pointing to 3 and 9 o’clock).
– Drumsticks go at the bottom, meat side pointing towards you (6 o’clock), bone side pointing towards the right and left sides (3 and 9 o’clock).
– The thighs should fit nicely in the opening in the center.
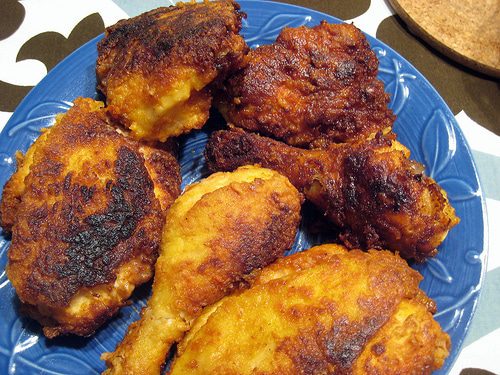
5. Cook for about 10 to 12 minutes a side, until the chicken in golden brown. The second side tends to be a little darker because the shortening has more stuff floating around in it. Double check doneness by using a probe thermometer, the internal temp should be right around 180 degrees.
– MOST IMPORTANTLY: Check the temperature of the shortening every minute or so. The shortening can literally burn. It has never happened to me, but I check the temperature 🙂
6. Drain the chicken on a cooling rack set over a sheet pan. This allows excess grease to drain while preventing the chicken from getting soggy.
I know this seems like long instructions, but people tend to be hesitant when frying things. The recipe isn’t difficult. Just follow the instructions and use a probe thermometer to monitor the oil temp.
One last nugget of wisdom for you. Buy a splash screen when frying… Cleaning the splash screen is much easier than cleaning the counters and floors 🙂





![Raw Cacao, Pistachio & Goji Energy Bars [Vegan + Gluten Free]](https://www.cookinggoals.com/wp-content/uploads/2020/02/photo15-300x300.jpg)
