Everything I create feels like a giant experiment. I’m one part baker, two parts home cook, and one part (mad) “scientist” (muahahaaa!). It takes a ton of trial and error, wasted ingredients, and determination to nail down a recipe I’m pleased with, but even after that process I’m constantly making mental notes on how I could tweak this or that to achieve a different flavor or texture of the final product. (Those judgmental critiques are one of the reasons I hardly find myself in restaurants – at some point during the meal I end up thinking, “gosh, I could have made this so much better at home and for like, HALF the price”. At least I’m not doing the dishes!) Most of my baking adventures begin from a craving of my own, a request from a friend, or a casual “I wish I could have…” longing that I happen to overhear. I love to pounce on a good challenge, so of course I headed to Sprouts to grab what I thought I’d need to whip up a batch of sugar/dairy/corn free caramels once being “commissioned”.
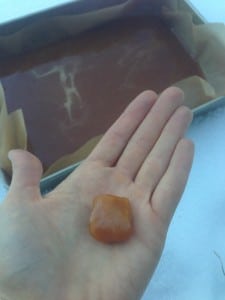
It took 5 attempts (20 cups of honey, 2.5 cups of “butter”, and 5 cups of coconut milk) to get these just right, though I’m afraid the batch I presented were a tad crunchy – overcooked. It seems ADD prevailed over OCD – I had bigger fish to fry (Literally. I’d been wanting to develop a grain free fish taco recipe and the thought of one more sticky sweet caramel made my teeth stand on edge). But don’t worry, I’ve made the necessary adjustments below!
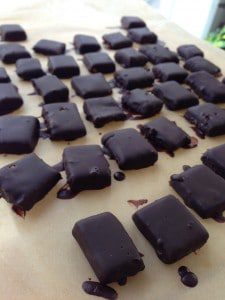
If you can eat store bought chocolate, HURRAY, melt it down and get after it! I’ve only found a few (expensive) brands that are “legal” for me, available at Whole Foods, and I’m not too crazy about their textures and/or flavors. So, I started making my own. Problem solved! I generally make it from a base of coconut oil* (cacao butter is fantastic, I just need to start buying it in bulk), which means it has a coconutty punch that I’ve grown rather fond of.
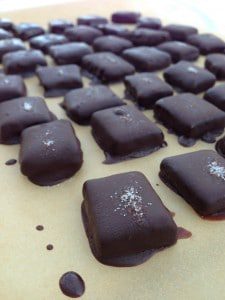
I’d love to try to answer any substitution questions in the comments – we’ll figure it out together!
*Coconut oil melts at 76* F, so these must be kept refrigerated!
Salted Chocolate Caramels (dairy/sugar/corn free, paleo, vegan)
Makes around 4-5 dozen
Caramel
4 cups Clover Honey or Grade A Maple Syrup
1 cup Coconut milk, canned full-fat
1/2 cup (4 oz) Earth Balance Coconut Spread
1/2 tsp Sea Salt
1/2 tsp Vanilla Extract (I’ll use the pod scrapings from 1 Vanilla Bean intstead if I have any on hand)
1/4 cup Cocoa Powder, for dusting
Chocolate Coating**
1 cup Coconut Oil, gently melted***
1 cup Cocoa Powder
1/4 cup + 2 tbsp Grade A Maple Syrup (I haven’t had much luck with Clover Honey)
1/2 tsp Vanilla Extract
dash of Salt
**Or, gently melt down your favorite chocolate/chocolate chips over a double boiler or microwave on high in 30 second increments.
***The coconut oil I buy comes in a glass jar, so I microwave it on high in 30 second increments until it’s just melted. Then I pour it into my measuring cup. If overheated, coconut oil will not re-solidify at room temperature.
Optional: Sea Salt for garnish
Special Equipment: Candy Thermometer and Parchment Paper
Line a 9×13 inch square metal pan with two sheets of criss-crossed parchment paper and set aside.
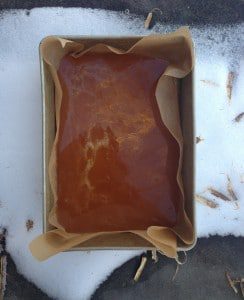
Bring the honey/maple syrup, coconut milk, coconut spread, and sea salt to a boil in a large sauce pan over medium-high heat. Attach (or hold) the candy thermometer so that it’s submerged into the syrup mixture but not touching the bottom of the pan. There’s no need to stir but you can gently swirl the pan a bit if you feel so inclined. We’re aiming for a target temperature of 250* F, or the “hard ball stage”, so keep a close eye on it. This should take around 15 minutes. Once the candy thermometer has reached 250* F, immediately remove from heat, stir in the vanilla extract, and pour into the prepared pan. Set aside and allow to fully cool. You can put them into the refrigerator to speed this along, or do what I did and slap the pan into some fresh snow outside.
Once cooled, gently lift the caramels from the pan by the nifty criss-crossed parchment paper and then cut into 1×1 inch squares with a lightly oiled knife or kitchen shears. Line up the cut caramels on a parchment lined baking sheet and place into the freezer for about 5 minutes, or as long as it takes to prepare the chocolate coating.
In a medium microwave safe bowl, combine the cocoa powder, coconut oil, maple syrup, vanilla extract, and dash of salt and whisk until combined. Set aside.
Place a 1/4 cup of cocoa powder into a large mixing bowl. Remove the caramels from the freezer and toss them around in the bowl of cocoa powder – it’ll act as a primer, giving the first coat of chocolate a little something to cling to. With a two-pronged candy fork (I actually use the chopstick end of these plastic Chorks!), dip one caramel into the chocolate at a time, flip it around to coat evenly, fish it back out, tap gently over the bowl to remove any excess chocolate that would pool around the bottom of the caramel, and then place back onto the parchment lined baking sheet. Repeat this process until all of the caramels are coated, then place them back into the freezer to set-up for another 5 minutes. Repeat the dipping and freezing process until the caramels have developed a decent coating of chocolate, about 4 times total. If the chocolate in the bowl starts to solidify, microwave on high in 10 second increments – you don’t want it hot, just barely melted! After the final coat, top with a light sprinkling of sea salt, if desired.
For a pretty presentation, wrap caramels individually in 4 inch pieces of parchment paper and twist the ends to seal. Alternately, gently stack them into cellophane treat bags and close tight with a pretty bow of ribbon or yarn. Orrr, just throw them haphazardly into Tupperware containers – they won’t be hanging around long, anyhow! Just remember to stash these in the fridge!!!

