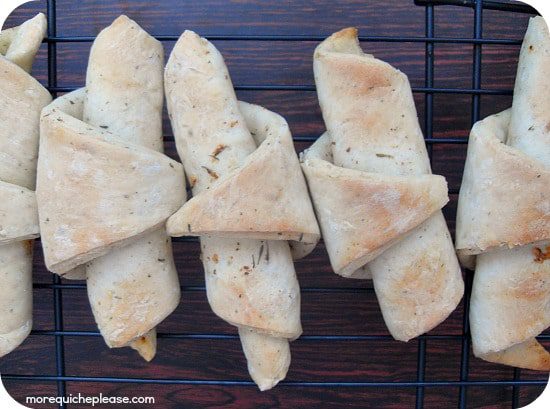
I’d like you to meet my garlic brown-butter breadsticks. I’m still not sure whether that’s the right name, though. They aren’t stick-like, so it feels weird to call them breadsticks. They’re rolled like croissants, but the dough is much thicker (and not flaky). “Garlic brown-butter breadsticks that look like croissants” was too long, though. So I cut off that last part.
Don’t they look fancy? You’ll be happy to hear that they’re a snap to make. Here’s how:
Start by mixing up a quick dough. There’s no need for rising (just two brief resting periods), and in my book, that means there’s no potential for failure. Just let it sit for 10 minutes and divide into three sections, rolling each one out into a shape that somewhat resembles a circle. Don’t both trying to shape it perfectly.
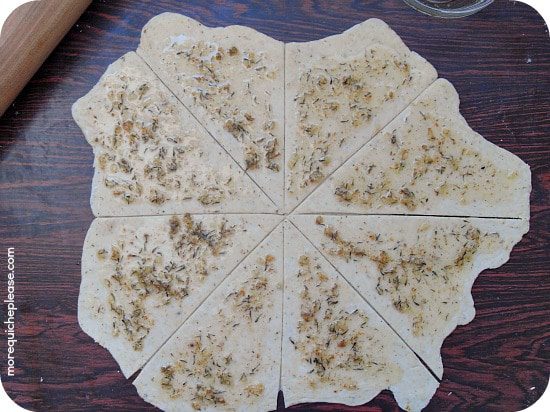
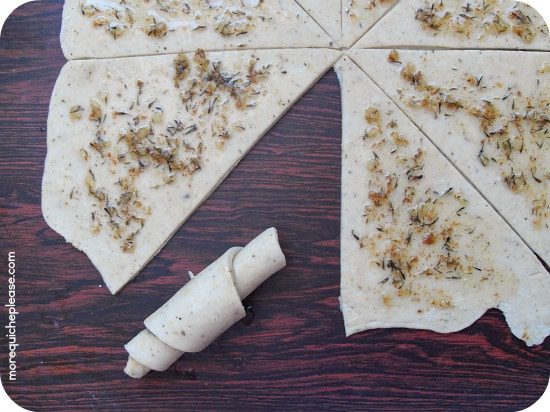
What’s that stuff brushed on the dough? Oh, just some brown butter infused with crushed garlic and thyme. Only the most delicious combination ever.
Slice the circle into eight wedges, just like you’re cutting up a pizza. Roll each piece starting from the widest part, and press the end against the rest of the roll to seal it.
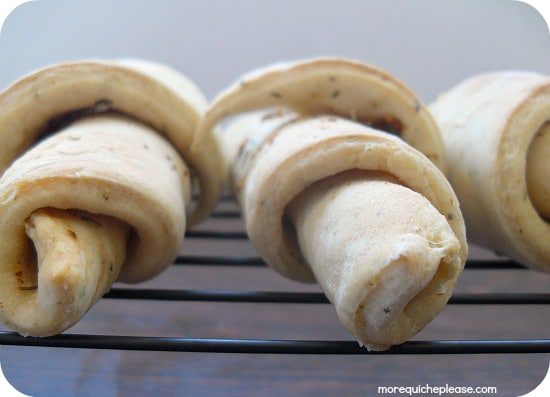
Lay them on a baking sheet with the ends facing down and let them rest another 10 minutes. What can I say? They’ve been working hard.

Set your timer for 13 minutes and pop them in the oven. They’re done when they’re lightly browned and fully set.
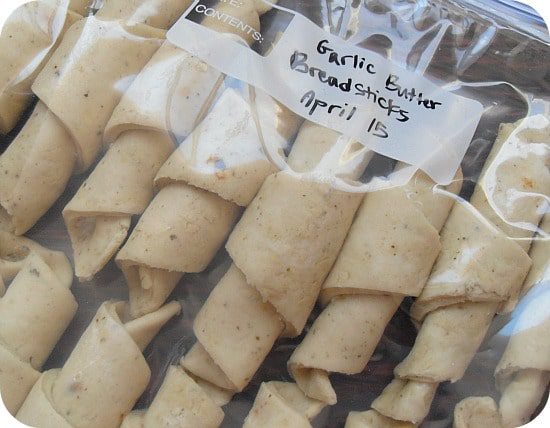
Garlic brown-butter breadsticks are wonderful with any soup, which we’re still eating several times a week because of all this fake spring weather. But what I really like to do is freeze them (i.e. bake one-third of the batch, and save the rest for later). Freeze raw and bake right before serving for best results.
We’ll be having some of those best results next week.
Garlic brown-butter breadsticks
Dough recipe from Confident Cook, Hesitant Baker
Yield: 24 breadsticks
Ingredients
- 1 cup warm water
- 1 cup warm milk
- 1 Tbsp yeast
- 6 cups all-purpose flour
- 1 Tbsp salt
- 1 Tbsp Italian seasoning
- 1 Tbsp garlic powder
- 3 Tbsp butter
- 3 cloves garlic, crushed
- 1 heaping tsp dried thyme
Directions
1. Pour the yeast, water, and milk into the bowl of a stand mixer fitted with a lightly greased dough hook. Let the mixture sit for 5 minutes.
2. Add the flour, salt, Italian seasoning, and garlic powder. Knead on speed #2 until the dough forms a ball and pulls away from the sides of the bowl. Alternatively, prepare the yeast mixture as directed in a large mixing bowl and stir ingredients together by hand. Knead dough until it comes together in a workable consistency.
3. Preheat the oven to 450 F/230 C. Place the dough in a lightly greased bowl and cover. Let rest for 10 minutes.
4. While the dough rests, prepare the garlic butter filling: Melt the butter and leave it over a high flame for about a minute after it’s already melted. You’ll see it foam up and then subside. Whisk it frequently. (Butter can very quickly go from brown to black, so don’t go far away.) When brown bits appear at the bottom of the pot, turn off the heat. Stir in the garlic and thyme.
5. Divide the dough into thirds. With a floured rolling pin, roll each third out on a floured surface. You want the dough to be pretty thin (I’d guess it measures in somewhere around an eighth of an inch). Brush the dough with the garlic butter stuff and slice it into eight wedges, pizza-style.
6. Roll up each wedge starting from the widest part. Press the ends against the rest of the roll to seal them. Place them on a baking sheet lined with parchment paper, ends facing down. Let them rest on the sheet for 10 minutes. Bake for 13 minutes, or until the dough is totally set and lightly browned.
Make ahead: Prepare breadsticks as directed through step 4 (but don’t bother preheating the oven). Freeze in an airtight bag and bake just before use.