It’s true that you don’t have to spend a ton of money on expensive, sugary commercial non-dairy yogurts.
It’s true that you can make practically any flavor you can think of in any quantity you choose.
It’s true that making homemade non-dairy yogurt is as simple as boiling water.
But how?
Whether you’re a daily yogurt-aholic or you’re just trying to maintain all those “friendly bacteria” your digestive system needs, there’s a DIY yogurt method for you. Once you see how easy it can be, you’ll surely be kicking yourself for wasting so much cash at the grocery store on something you can make for practically pennies.
Preparing your yogurt medium
All DIY yogurt recipes start the same way. You can adjust these quantities up or down, but I find that making this amount of yogurt yields not only the best results but also makes the right amount of yogurt for me for one week. If you’re making yogurt for more than one person, you may want to double the batch.
Here’s what you’ll need:
1 quart plain unsweetened non-dairy milk of your choice (full fat versions!)
2-3 Tb plain unsweetened soy yogurt (about half of a 6oz cup)
2 quart or larger stock pot with lid
Instant read thermometer like this one (optional)
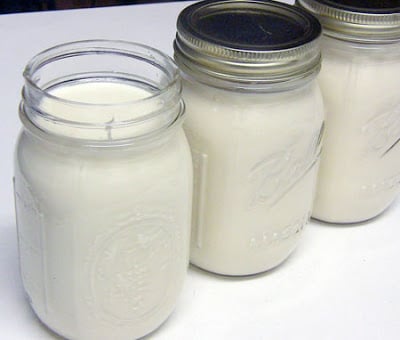
In your stock pot, bring your non-dairy milk to a simmer, stirring frequently to ensure that the milk doesn’t scorch. Alternately, you can do this in a double-boiler to take out a little anti-scorch insurance. Use your thermometer and bring the mixture up to 185°F. If you’re doing this sans thermometer, you’ll know the mixture is the right temperature when tiny bubbles form around the edge of the pot that cannot be stirred down.
While you’re waiting for your milk to reach its goal temperature, fill your sink with ice water. Once the magic temp is reached, transfer your pot of milk to the ice bath, being careful not to get ice water inside the pot. If you’re using a thermometer, cool the milk down to 110°F. This usually takes about 20 minutes for a 1-qt batch. Stir in soy yogurt (you may want to use a whisk) and cover with a lid.
Now that you’ve prepared your yogurt medium, we move on to the next step: incubation. Your yogurt-milk mixture needs to stay at an even 105-110°F while the yogurt cultures multiply (that is, procreate). You’ll want to select your method before you pitch your milk (the above steps) so that everything is ready to go when your milk is ready.
There are 3 main options for incubating your homemade non-dairy yogurt.
The Insulated Cooler Method (aka The “all materials on hand and no extra cost” method)
This is a great method for the skeptic who doesn’t want to spend any money to find out if they like making their own yogurt. All you need is a standard cooler (plastic or foam), an electric heating pad, and a vessel large enough to hold your yogurt medium. I recommend splitting your yogurt-milk mixture into several smaller glass jars. And always leave the lids off during incubation! Just set the heating pad on “low” and place along the bottom of the cooler. Place jars of pitched milk on top of the heating pad and put the lid on the cooler. Leave undisturbed for 7-8 hours, then check your yogurt’s consistency. If you like thicker yogurt, it may take 2-3 additional hours.
Pros: Requires no additional equipment or expense
Cons: Can be a bit tricky and time for incubation may vary widely from batch to batch, depending on conditions
The Dehydrator Method
If you have a box-style dehydrator with a low temperature setting, this method works great. If your dehydrator doesn’t have settings in degrees, I suggest doing a test run at “low” or “low-medium” and using a thermometer to find the right setting to keep your pitched milk at 105-110°F. As with the cooler method, simply place jars of pitched milk in the dehydrator and run for 7-8 hours. I used a dehydrator to make my yogurt in the past, and I liked to set it up in a back utility room so I didn’t have to listen to the fan. It’s also a great method for making yogurt overnight.
Pros: No extra equipment is required if you already own the dehydrator and the yogurt results are foolproof.
Cons: Ties up your dehydrator so you can’t make other things!
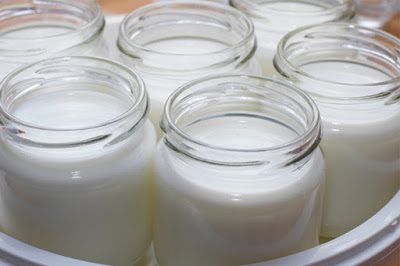
Some yogurt makers come with 6oz jars for individual portions.
The Yogurt Maker Method
The third and final method is what I use today. After having used a box dehydrator for several years, I finally cracked and bought a dedicated yogurt maker. I had previously been skeptical and now I don’t know why I waited so long. Since I typically make a batch of yogurt every week, I could justify the small investment, knowing that I could easily make enough yogurt for the machine to pay for itself within a short amount of time.
I personally use and highly recommend theYolife Yogurt Maker which comes with 7 6-oz glass jars but is also adaptable to use with your own larger jars. It’s easy to use, draws very little electricity, and makes yogurt overnight with consistent, reliable results. Hands down, this is the best method for a daily yogurt eater who might need to make 1-2 quarts or more per week.
Pros: Reliable results with every batch
Cons: Requires a small investment up front