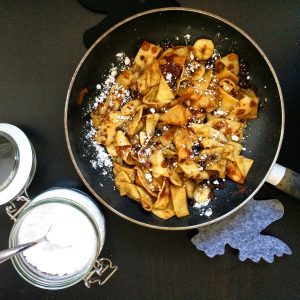
 People always say, ‘when life gives you lemons, make lemonade.’ I say, ‘when life gives you black overripe bananas, make Momofuku banana cream pie.’
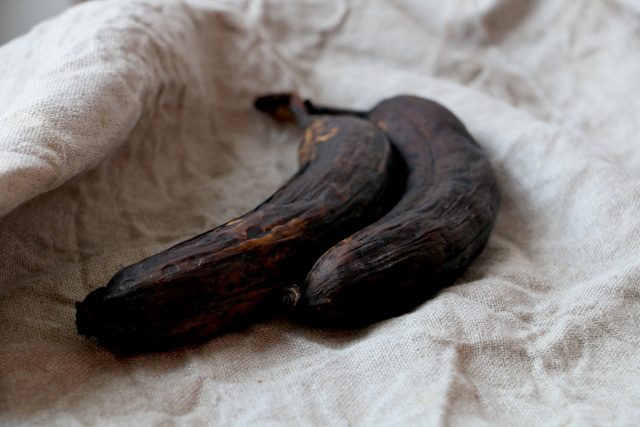
Who knew that leaving your bananas to practically rot away in your kitchen over Christmas by mistake was a good thing?! Blackened bananas are the key ingredient to this unforgettable pie. They are the starring ingredient here, paying homage to the humble banana. This brilliant idea comes from Christina Tosi, creator of Momofuku Milk Bar.
In Tosi’s recipe, she recommends leaving your bananas to ripen until the skin is practically black. This way they become intensely flavoured, soft and with an unmistakable caramel punch to them. Not the kind of banana you’d like to eat though. Save your sweet yellow eating bananas for the hidden middle layer of sliced banana.
I absolutely love the ideas that emerge from the Milk Bar cookbook. Using humble ingredients, Christina Tosi creates approachable and unique desserts. I’m drawn to her diverse use of everyday foods; ones that you wouldn’t typically use in baking. For example, her compost cookie is packed with chocolate chips, pretzels and crisps! The Momofuku Milk Bar book will definitely be a new addition to my bookshelf.
So before you emerge in the new year a new you, healthier and vowed off sugar for the best part of January; I urge you to try this ingenious creation. Theres always room for more pie in my world.
Fun internet watching: If you want to know more about this and watch Christina herself make this pie, you can watch it in the series “The Mind of a Chef” in the episode ‘Rotten.’ A great quick watch I’d highly recommend. Click Here to watch
Ingredients – Makes one 10 inch pie – Recipe very slightly adapted from Momofuku Milk Bar
*Changes to the recipe: I have decreased the amount of sugar in both the banana custard and chocolate base. I really wanted the base to be bitter and dark against the sweet custard so decided to leave out the second amount of sugar which is usually added after baking.
**I have also increased the gelatine as a few people online had said that the pie was too soft to slice. The cream filling is still very soft, but this makes for great eating. Feel free to increase the gelatine even more if you’d prefer it to slice more neatly.
Crust
- 85g unsalted butter (Plus 30g for finishing the crumb)
- 100g plain flour
- 1 tsp. cornflour
- 65g cocoa powder
- 100g caster sugar
- 1 tsp. sea salt
Banana Custard Filling
- 225g very ripe bananas, black stage (approx. 2 bananas)
- 235g double cream
- 55g whole milk
- 100g caster sugar
- pinch of salt
- 25g cornflour
- 3 egg yolks
- 1 1/2 tsp. powdered gelatine
- 40g unsalted butter
- yellow food colouring
- 50g icing sugar
- 1 banana (just ripe) peeled and sliced
Method
For the Chocolate Crust:
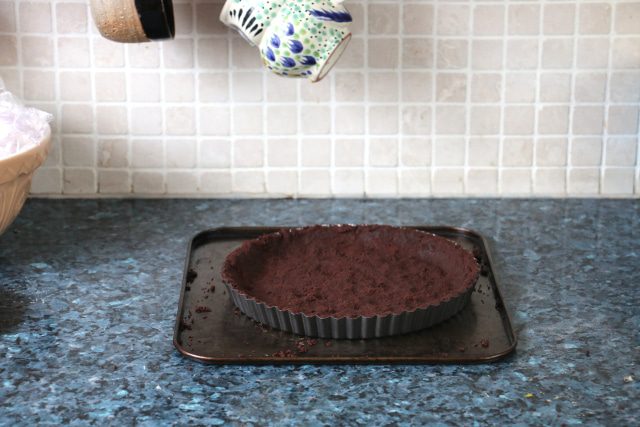
- Heat your oven to 150°C and line a baking tray with baking parchment.
- Melt the 85g of unsalted butter in the microwave.
- In a bowl or in a stand mixer, combine the flour, cornflour, cocoa powder, sugar and salt. Stream in your melted butter and mix until it all comes together into clumps.
- Sprinkle the crumbs onto your prepared baking tray and bake for approx. 20 minutes until they are dry but still slightly moist in the middle. Leave to cool.
To make the Banana Custard Filling:
- Place the overripe bananas, 75g double cream, milk, sugar, salt, cornflour and egg yolks into a blender (I used my nutribullet.) Puree until everything is combined and smooth.
- Pour the mixture into a saucepan and clean your blender.
- Following the packet instructions, bloom your gelatine in water. (I placed my gelatine in 2 tbsp. of water.)
- NOTE: My packet instructions said to place my gelatine in hot water. However, at work I’ve always used powdered gelatine with cold water. Make sure to sprinkle your gelatine over the surface and then stir into the cold water or it will clump up. Leave your gelatine on the counter for 5 minutes, to allow the gelatine to absorb the water and ‘bloom.’ Once bloomed, heat the gelatine very gently until it is all dissolved. Make sure that you don’t boil the mixture as that will destroy its setting agent. Use your gelatine mixture warm, not set.
- Place your banana mixture over medium heat, whisking continuously. The mixture will thicken and start to boil. Once bubbling, continue to whisk for 2 minutes on medium heat to cook out the cornflour completely. The mixture should be very thick and cement coloured.
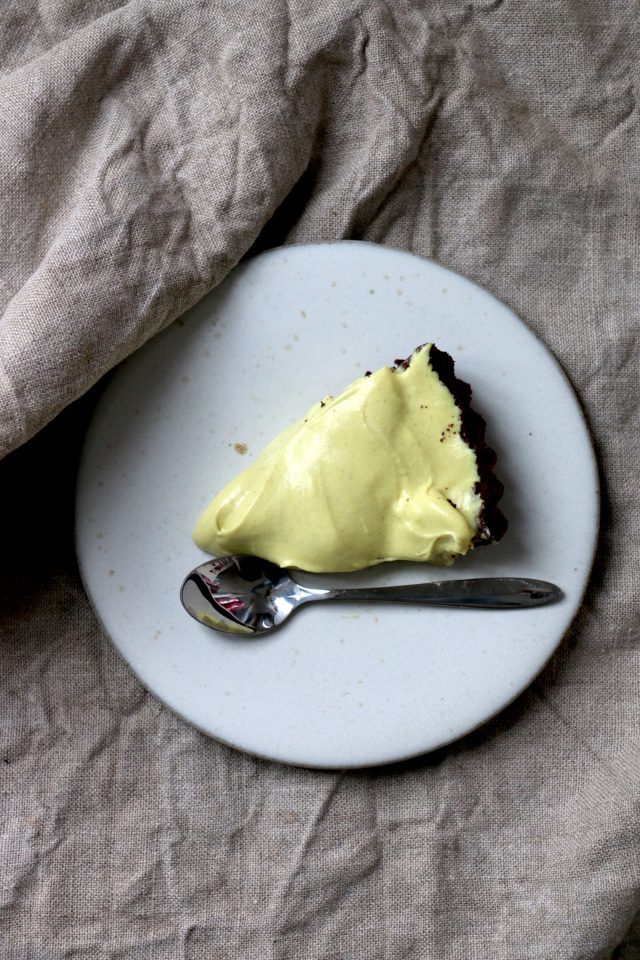
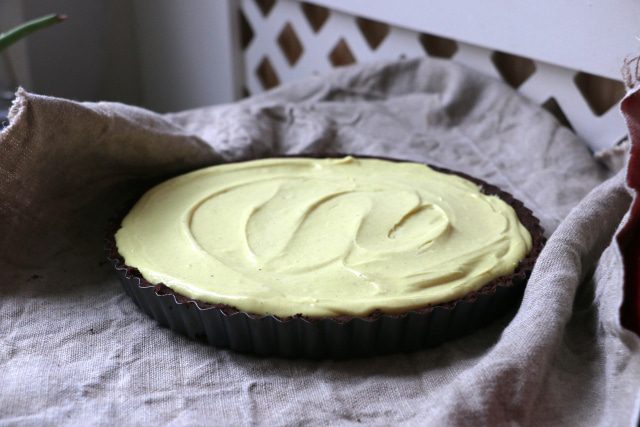
- Scrap the cooked banana custard back into your blender and add the butter and melted gelatine. Puree until completely smooth and glossy. Add in your yellow food colouring (it takes a lot) until your left with a shiny yellow custard.
- Cover the surface of the custard with cling film and refrigerate for 1 hour until completely chilled.
- Once chilled, take the remaining 160g of double cream and whisk to soft peaks with the icing sugar. Slowly fold together the soft cream and cold banana custard.
To finish the Chocolate Crust and assemble the pie:
- Take your cooled crumbs, and pulse in a food processor until your left with fine crumbs. Melt 30g of unsalted butter and stream into the crumbs until it holds together when you press it in-between your hand.
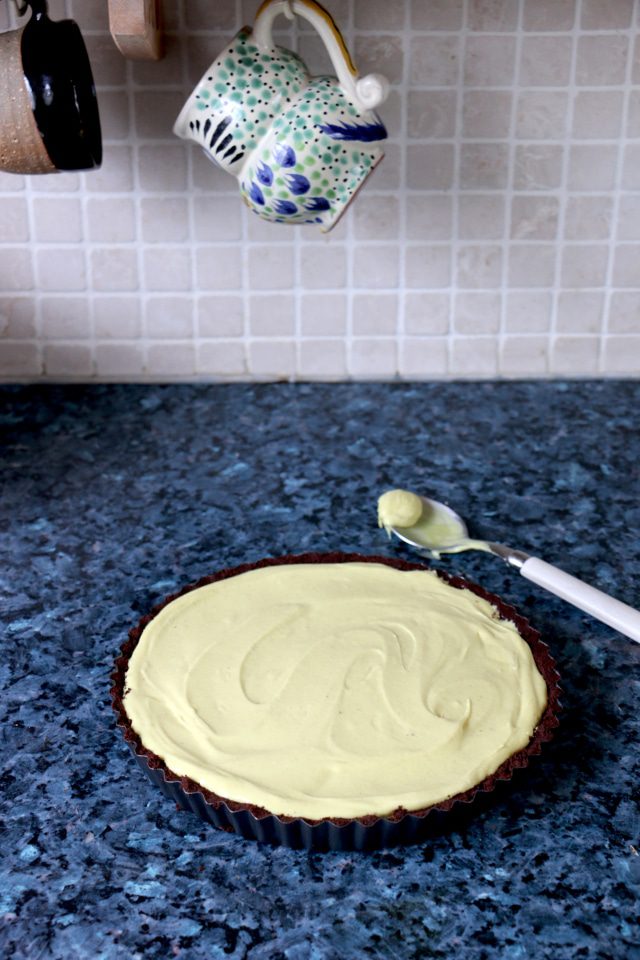
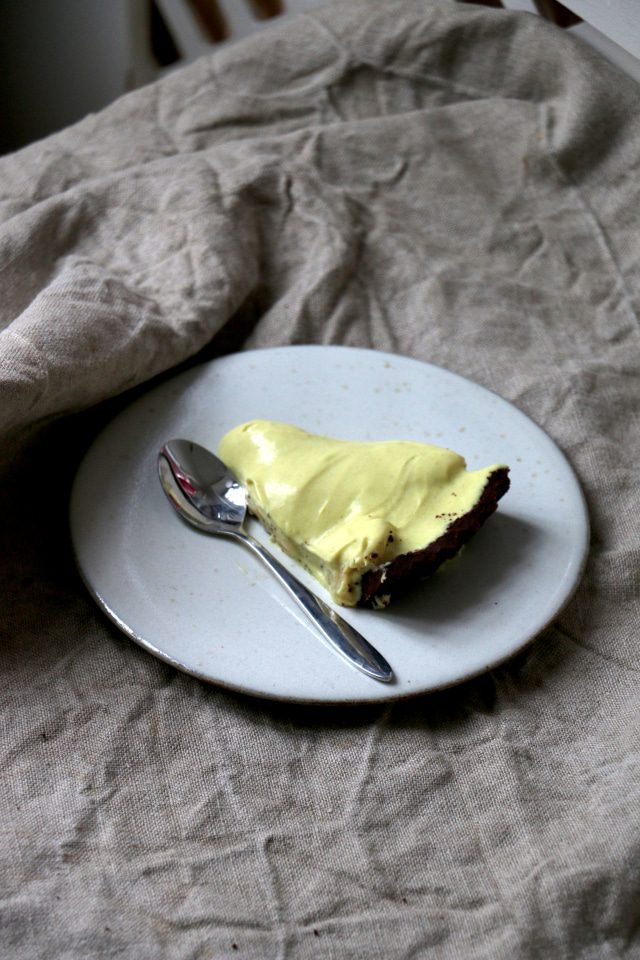
- Place the crumbs into your pie dish and press them firmly into the tin with your fingers, leaving you with a glorious chocolate pie crust.
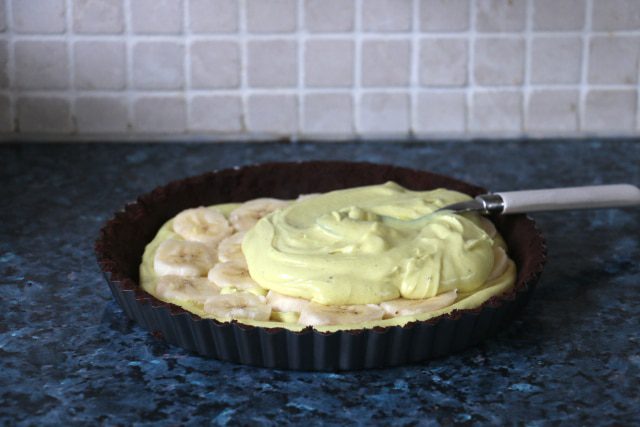
- Take a third of your banana cream and spread it evenly into the pie crust. Layer your sliced banana so that every bite gets a piece. Finish with the rest of the banana cream.
- Chill for 1 hour before serving. Best eaten the day its made.


![Raw Cacao, Pistachio & Goji Energy Bars [Vegan + Gluten Free]](https://www.cookinggoals.com/wp-content/uploads/2020/02/photo15-300x300.jpg)