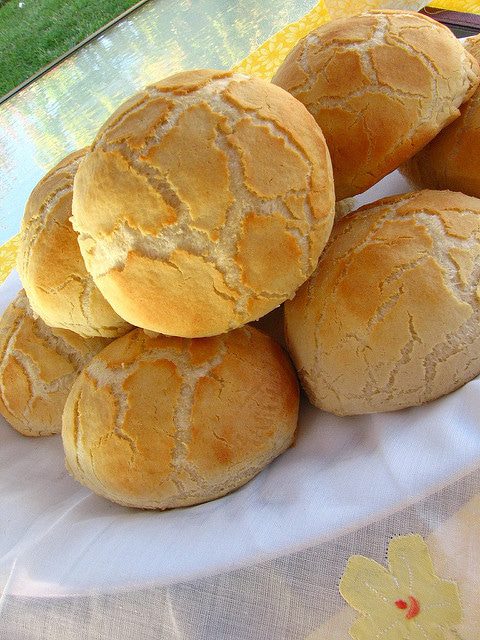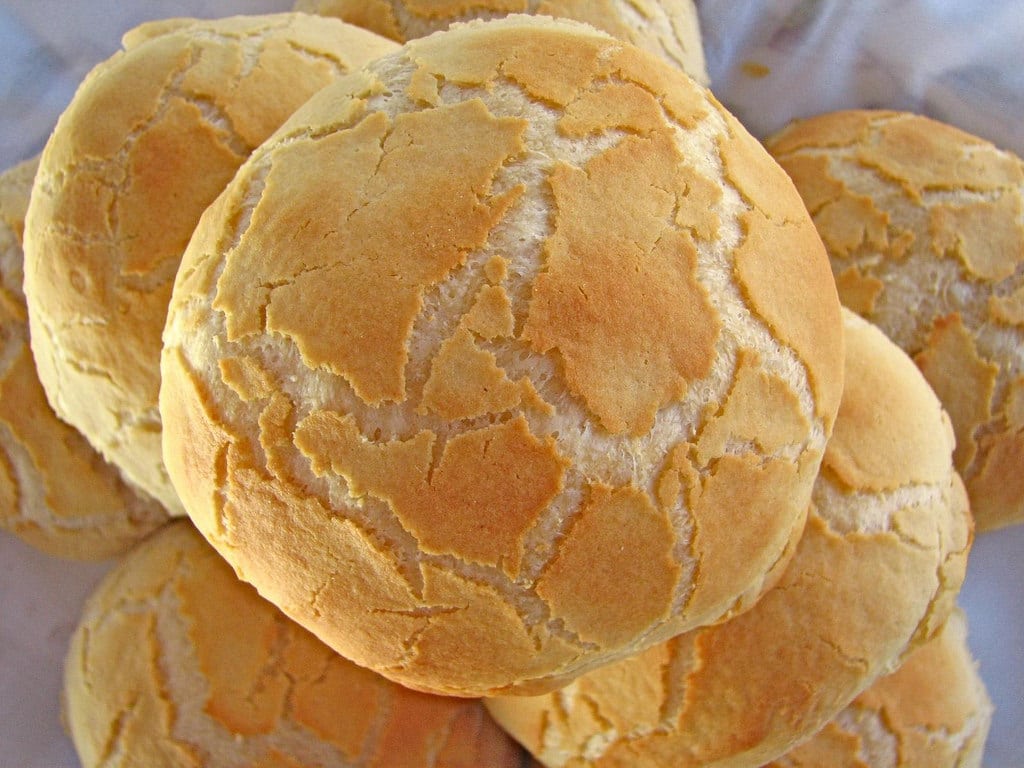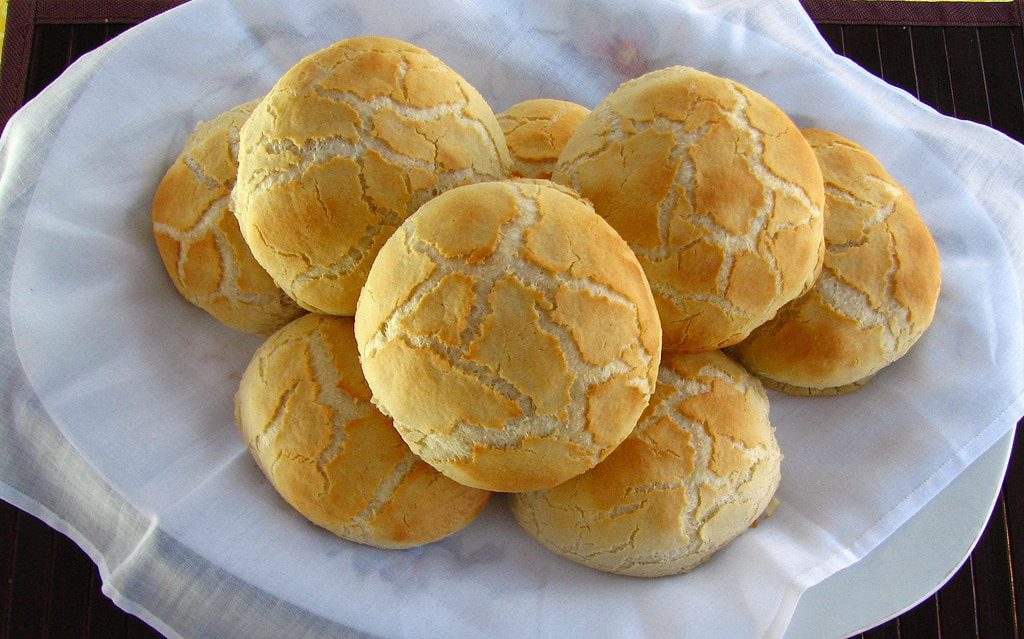
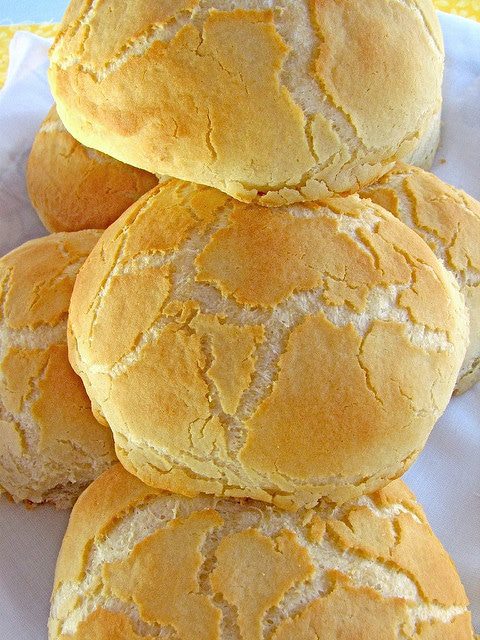
San Francisco may be well known for its sourdough, but don’t think the city’s yeasty traditions end there. Unknown in origin, Bay Area sandwich and bread lovers have lusted after Dutch crunch bread for decades. Before baking, the dough is covered in a thick rice flour batter that cracks as it bakes. This “crunch” is slightly sweet and crispy, turning the dense (yet moist and soft) bread into something special. I know I’m not the only one who strips her bread of its crunch before eating. It’s justreally good.
Until recently I had no idea what this bread was called. A few weeks ago,Jo was tweeting about Dutch crunch. Curious, I asked her what it was and then proceeded to look it up. I had eaten this bread before–a lot. I used to eat Dutch crunch all the time in Berkeley. It was in the grocery stores and at the sandwich shops I frequented, but I don’t think I ever learned its name. If I did, its disappearance from my life over the last four and a half years had erased it from my mind. See, it’s really hard to find Dutch crunch in other cities. I’ve never seen it in Los Angeles, DC or the Midwest. None of my friends from different parts of the country know what it is. They do, however, eat it in the Netherlands and the UK, where it’s known as tiger bread. So when we became reacquainted in San Francisco two weeks ago, I knew I had to find a way to keep Dutch crunch in my life forever.
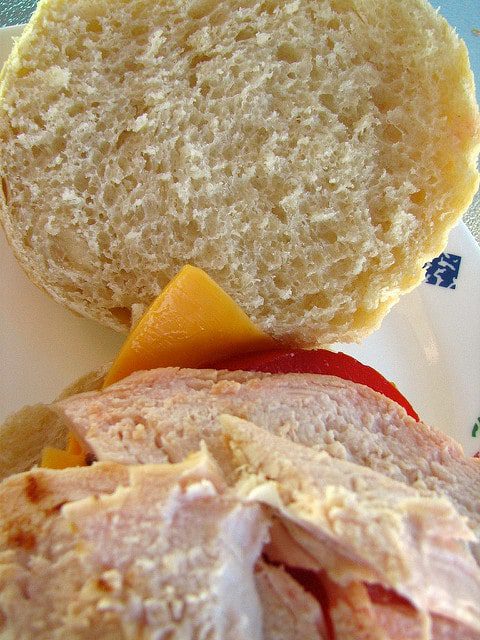
And thus begun today’s bread making adventure. I am delighted to announce that I foundthe recipe on first try. The texture and taste are perfect and it made a great base for my chicken sandwich. I’m trying really hard not to go back into the kitchen and eat one of the leftover rolls. I might just hide one before I go to bed…
Dutch Crunch Bread
(Makes 8 Rolls)
Bread (From Baking Bites)
2 1/2 tsp. active dry yeast
1/4 cup warm water
1 cup warm milk
1 Tbsp. sugar
2 tsp. vegetable oil
1 1/2 tsp. salt
2.5 – 3.5 cups all purpose flour
Topping
(From The Bread Bible)
1 Tbsp. active dry yeast
1/2 cup warm water
1 Tbsp. sugar
1 Tbsp. vegetable oil
1/4 tsp. salt
3/4 cup white rice flour
1. Place sugar and yeast along with the warm water, warm milk and oil in your mixer bowl. Mix for 30 seconds and let sit a few minutes until dissolved.
2. Mix salt with 2 1/4 cups flour and to the bowl, mixing on medium until the dough comes together.
3. Switch to dough hook and slowly add the last 1 1/4 cup until bowl pulls away from the side of the bowl. I ended up adding a total of 2 3/4 cups.
4. Turn mixer to medium and knead until tacky and smooth. Alternatively, you can do this step by hand.
5. Place dough in an oiled container and let rise until it has doubled, approximately an hour.
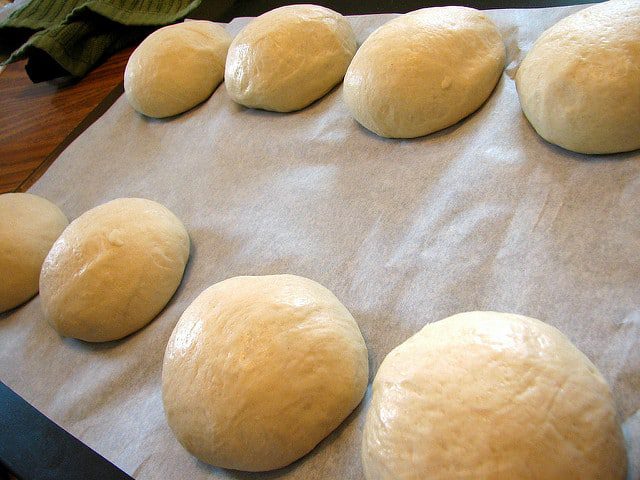
6. Turn out dough onto lightly floured surface. Shape into 8 balls and place on lined baking sheet, and cover. Let sit for 15 minutes. (I ended up with 8 balls of approximately 90 grams each.)
7. In the meantime, mix up topping. Dissolve yeast and sugar in water. Add in vegetable oil. Then rice flour. Whisk all ingredients together until you get a thick cake batter-like consistency. It should be smooth. Let sit for the rest of the 15 minutes, plus another 10 minutes.
8. Rolls should have risen a little bit by this point. With a brush, spread topping all over each of the rolls. This should be done in a thick layer. Brush a generous layer on each roll. Then brush a second layer on each roll, using up all of the batter. This step is why you need parchment or a silpat on your baking sheet.
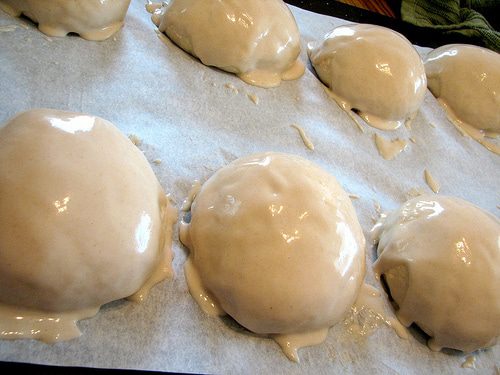

My dad thought these were some sort of dim sum filled buns.
9. Let rolls rise for another 20 minutes until puffy. In the meantime, preheat oven to 350F.
10. Bake for 25 to 30 minutes, until golden brown. Let cool. You must let them cool–the topping tastes a bit weird until it’s completely set and cooled.