I am getting the hang of these macaron things. I make them way slower than they are eaten in this house but that is only a good thing, right?
They take some amount of practice and each time I make them, I think, they turn out a little better than the last. This time however, I did few things different and I will share them with you in the recipe below.
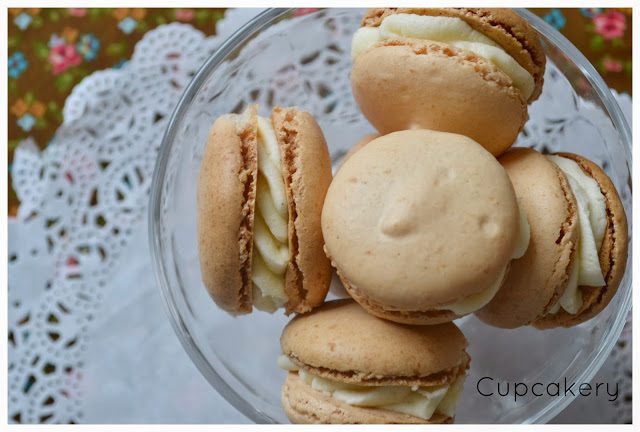
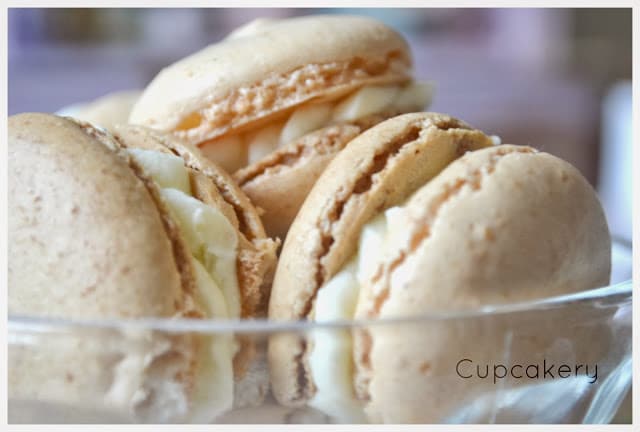
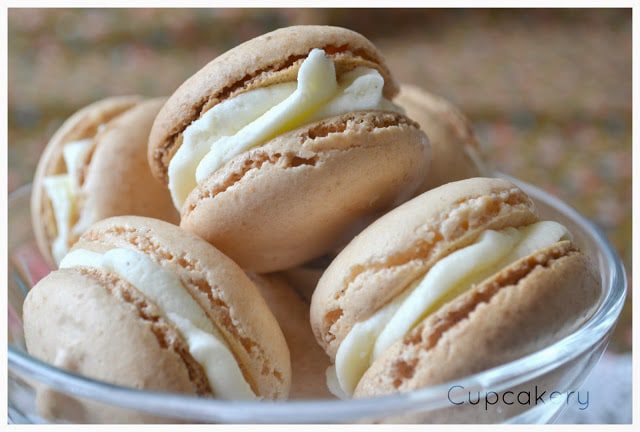
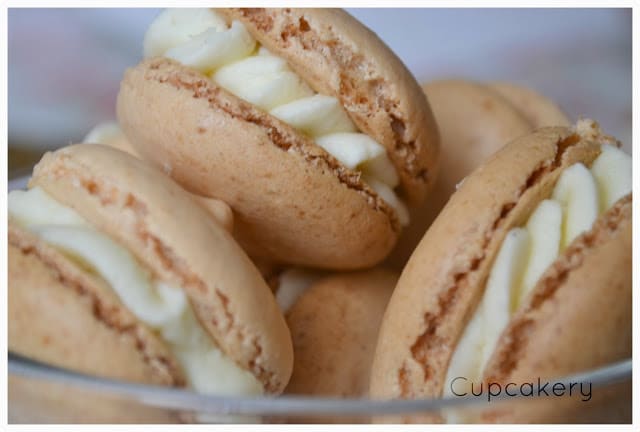
Ivory Macarons: Yields 40 ish… whole, two sided macarons. It’s all depending on how many you eat when they come off the tray see…
- 4 egg whites at room temperature
- 125g ground almonds
- 225g icing sugar
- 75g granulated sugar
- 1-2 drops of ivory food colouring
Line two baking sheets with parchment. I drew 2/3 inch circles on the under side of my parchment as a guide for piping… but you can wing it if that’s how you roll!
And here is what I did differently this time…
- I popped the ground almonds and the icing sugar into my food processor and pulsed away at it until it was all one big homogeneous mixture. It has been ground down to a super fine dust and this made me very happy.
- I used room temperature eggs that had been aged only a few hours, possibly two, instead of eggs that were a few days old. I put them in my mixer with the whisk attachment and turned the speed on low. When I saw they were frothy, I dropped in the ivory food colouring and then I started to slowly add the granulated sugar, in a steady stream. I turned the speed up to medium and left it whisk away until nice, thick and glossy.
- I added the ground almonds/icing sugar mixture into the egg whites mixture and folded it together until it was well mixed and had a texture of molten lava.
- I used my biggest round piping tip and piped out dots on to the parchment. I then left the baking trays at room temperature, on my kitchen table for two whole hours… I wasn’t there watching them! I took Dolly to training, did the shopping, washed the dishes and set the fire. I also preheated my oven to 150 and after the macarons had gone tacky on top I popped them in for 12-15 minutes.
- You know they are done when they have puffed up a little, grew their feet and the shell is hard on top.
- Leave them to cool for a bit and then fill and enjoy!

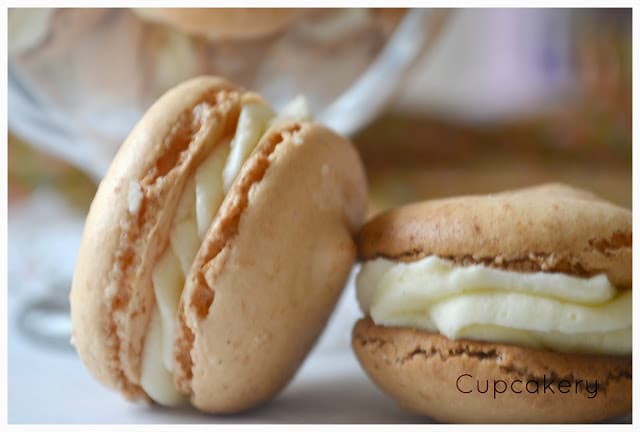
These particular batch got filled with yummy vanilla buttercream and I have to say I am incredibly pleased with their turn out. I feel that each time I make these I get the hang of it a little better.
I would like to know how to get them shinier on top though… Has anyone any suggestions there?
Hope you all are having a super Tuesday… I know I am!!