The first experiment with the Dutch Oven was simply awesome and the next experiment with the Forkish recipes was the Overnight bread – a crusty, full-flavour, bread that has a richer flavour thanks to the overnight rise. I’m way behind my posts and it’s now getting embarrassing to tell people that they will have to wait to get the recipes. So I’m going to skip all the story-telling and dive into the recipe-telling. Here goes:Ingredients
All purpose flour 500 gms
Water 390 gms
Salt 11 gms
Instant yeast 0.8 gms (1/4 tsp)
Method
1) Autolyse: Mix the flour and the water in a large mixing bowl by hand till the flour is completed hydrated. Cover with cling wrap and let it rest for 30 minutes.
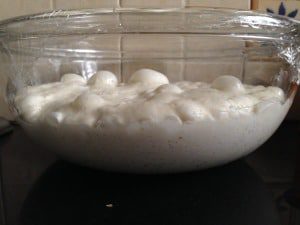
The dough will rise to 3 times its volume overnight, so please factor that while you choose your bowl. Here’s a video from Ken to show you the process.
2) Mix: Keep a bowl of water close by (deep enough for you to dunk your palms into). The dough that we’re working on is sticky and wetting your hands periodically will help keep the dough from sticking to your palms. Sprinkle the yeast and the salt evenly on the surface of the dough. Wet you working hand and reach underneath the dough and grab about 30% of it. Gently stretch this and fold it over itself. Repeat till all of the salt and the yeast are completely covered with dough. To get the salt and the yeast fully interspersed, use your thumb and index finger like the blades of a pair of scissors and make 5 to 6 cuts across the entire mass of dough. Fold the dough over itself a few times. Repeat this, alternately cutting and folding till you think all the ingredients have been well mixed and you feel the dough tightening up. Ken Forkish says that you should target a dough temperature of 25°C to 26°C. I’ve never managed this as the dough temperature (even in Bangalore) hovers around 28-29°C. Cover and let the dough ferment or rise.
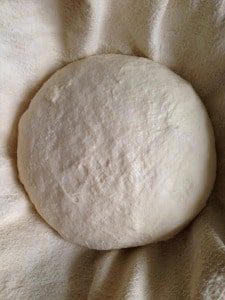
3) Fold: This dough needs 2 or 3 gentle folds, ideally during the first 1 1/2 hours of its fermentation process. I do the first fold, 10 minutes after Step 2 and the second fold 40 minutes later. I did the third fold 40 minutes after the second fold. So in 90 minutes I completed the 3 folds, covered the dough and let it continue to rise overnight at room temperature. A simple thumb rule is to fold the dough after it has relaxed and spread out across the container. Here is a video from Ken Forkish that should make it easy for you. This is what my dough looked like when it had tripled in volume.
4) Transfer: Moderately flour a work surface. Flour you hands and sprinkle some flour on the edges of the container – this helps the dough ease itself out without sticking to the sides. Gently ease the dough from the container onto the floured work surface. This is what it looked like for me.

5) Shape: The dough now needs to be shaped into a tight ball without letting out all the gas that has been built up in the dough. Liberally dust the container that you intend using with flour. Ideally this step is done in proofing baskets made from wicker, but I used a glass bowl lined with a flour dusted kitchen towel. Keep some flour handy as you’ll need to flour your hands constantly to avoid the dough sticking to the them. Using the same stretch and fold technique, pick up a third of the floured bottom, stretch and fold it over itself. Repeat this process, gently stretching and folding till you have a ball-like shape with a little tension on its surface. Now, gently flip this over and move to a clean and dry area of your work surface devoid of flour. Cup your hands around the back of the dough ball and pull it towards you for about 6 – 8 inches. Use your little fingers to push the dough ball forward – this step helps the dough ball grip the un-floured, work surface and tightens the dough surface creating tension. Give the dough ball a quarter turn and repeat till you’ve gone all the way around the dough ball. The dough surface doesn’t have to be taut but it needs some tension to hold onto its shape and the gases inside. This is what it looked like
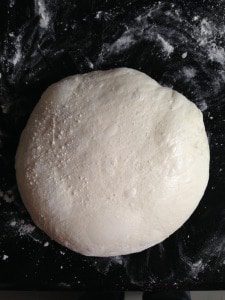
5) Shape: The dough now needs to be shaped into a tight round without letting out all the gas that has been built up in the dough. Liberally dust the container that you intend using with flour. Ideally this step is done in proofing baskets made from wicker, but I used a glass bowl lined with a flour dusted kitchen towel. Keep some flour handy as you’ll need to flour your hands constantly to avoid the dough sticking to the them. Using the same stretch and fold technique, pick up a third of the floured bottom, stretch and fold it over itself. Repeat this process, gently stretching and folding till you have a ball-like shape with a little tension on its surface. Now, gently flip this over and move to a clean and dry area of your work surface devoid of flour. Cup your hands around the back of the dough ball and pull it towards you for about 6 – 8 inches. Use your little fingers to push the dough ball forward – this step helps the dough ball grip the un-floured, work surface and tightens the dough surface creating tension. Give the dough ball a quarter turn and repeat till you’ve gone all the way around the dough ball. The dough surface doesn’t have to be taut but it needs some tension to hold onto its shape and the gases inside. This is what it looked like
.
6) Proof: All you need to now do is lightly dust the surface of the loaf with some flour, cover it with a kitchen towel / cling wrap and leave it to proof (2nd rise) for approximately an hour. Here’s the master – Ken, showing you how to figure if your dough is proofed or not by the finger dent test.
7) Pre-heat: 15 minutes after you’ve started the proofing, place a cast-iron Dutch Oven into your oven and pre-heat for 45 minutes to 250°C.
8) Bake: Bake for 30 minutes at 245°C with the lid on followed by 15 – 20 minutes with the lid off at 225°C or till the loaf is a gorgeous medium dark brown. Ken Forkish doesn’t recommend dropping the temperature but my DO sits on the lowest rack in my home oven and hence, the bottom can get scorched – so I drop the temperature by 20°C when the lid is off. When this is done, transfer to a cooling rack and it rest for 30 minutes before slicing. Here’s yet another video in which Ken shows you how to do this step.
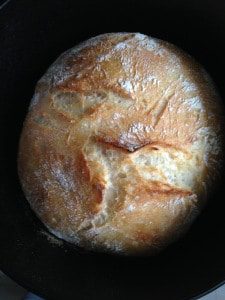
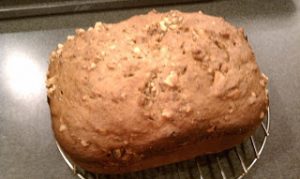
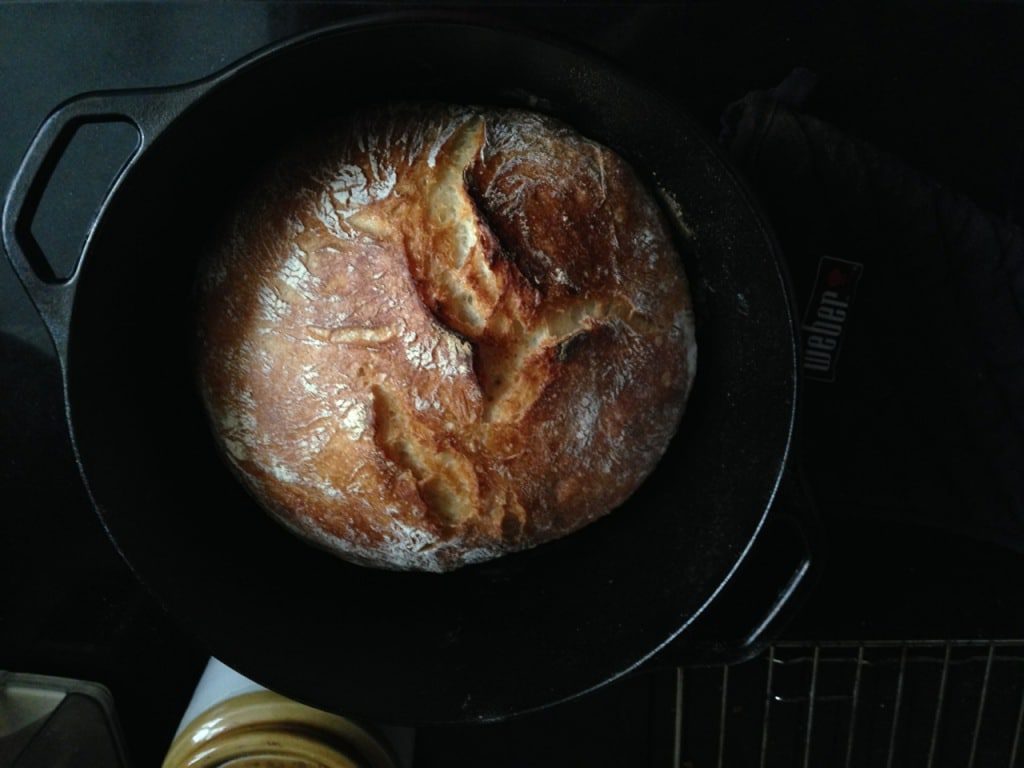
Here’s what my loaf looked like after the first 30 minutes with the lid on.
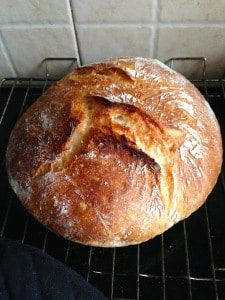
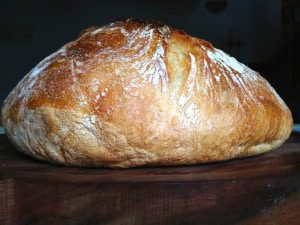
And here is what it looked after it was baked with the lid off for 15 minutes.
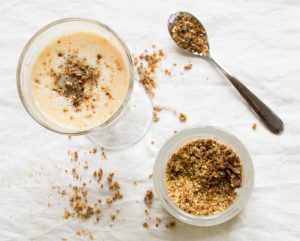
Some more pictures:

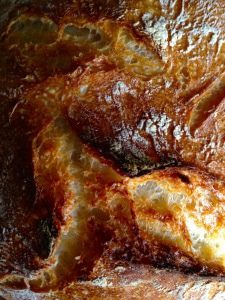
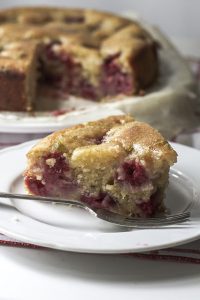
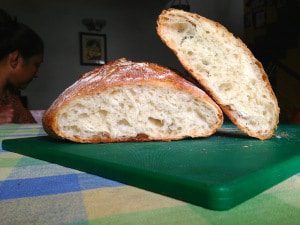
And here’s what the crumb looked like. Was fulfilling – to say the least.
Learnings: Everything about our lives is about doing more with less. And, time is a resource that’s always in short supply thanks to our incessant and never ending need for convenience. But there is a price to pay – when we don’t give ourselves and the things that matter most to us time – there is always a price to pay! The flip side to this is the opportunity we all have – to make time for us and for the things and the people who matter to us.